
Original (requires Weibo account, Chinese): https://weibo.com/ttarticle/p/show?id=2309404786134344401123
This is a translated version of the operating instructions for Pick Me Up Miku. The wording has been machine-translated then rewritten by me to (hopefully!) make sense.
- Unscrew the screw at the bottom of the base, open the battery cover and insert 3 x AAA batteries and close the battery cover
- Open the battery cover at the bottom of the remote control, insert 1 x CR2025 battery and slide it in.
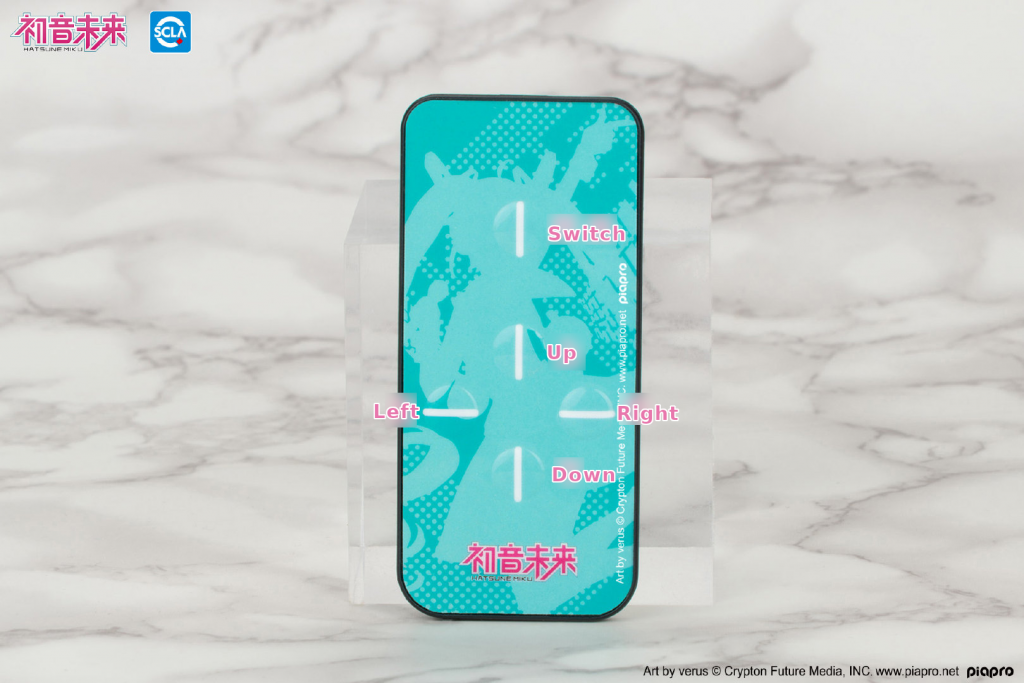
- Press the ‘switch’ button on the upper part of the remote control to turn on the base light
- The arrow functions are as follows:
- Up: Increase the brightness
- Down: Decrease the brightness
- Left: Next lighting effect
- Right: Previous lighting effect
If there is a problem with the remote control or lighting effect, please refer to the following steps to check operation and diagnose issues.

NOTE: The following instructions are only for self-testing/fixing Pick Me Up Miku when the base lighting is not working properly, and is not suitable for daily operation. If it functions normally, please do not use this part of the guide, so as to not cause issues.
If the lighting does not work after these diagnostic steps, please consult our after-sales. [Author’s note: Not sure if this is available to international customers, but they do have an email of support^at^apex-toy.com. If you bought from an international retailer, I would advise contacting the retailer in the first instance]
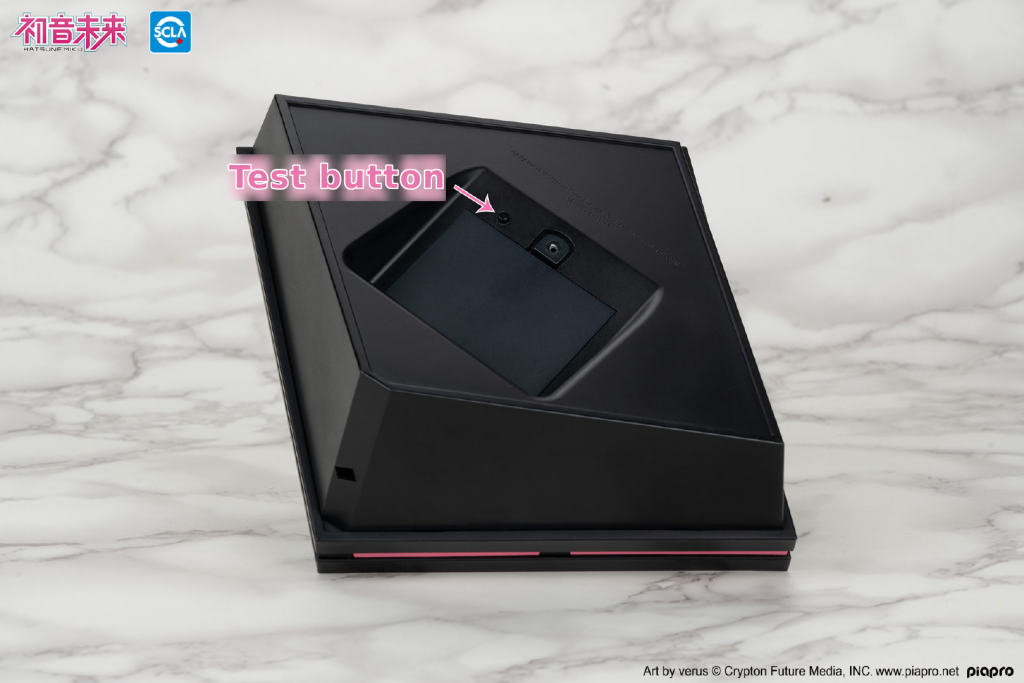
Test base lighting
- Open the battery cover, install 3 x AAA batteries and close the cover. Preferably, use three of the same AAA batteries with the same amount of usage. Ensure the batteries have sufficient charge.
- After confirming the batteries, press and hold the button next to the battery cover for about 3 seconds to light up the base. Press and hold again for 3 seconds to turn off.
- When the base is lit, quickly press and release the button next to the battery cover to switch the lighting effect.
If the above works, the base lighting has been confirmed to be functional. If not, it is likely a fault with the circuitry.
Test remote control pairing
- With the signal-transmitting port [that’s the LED-y bit] pointing upwards, the button at the top is the “switch” button, and the four lower buttons are up, down, left and right.
- Install the battery for the remote control, and press a button. The signal transmitter port should emit a red light.
- Install the base batteries, and test the remote buttons, as per the instructions.
- As the remotes are paired at the factory, please ensure you’re using the correct remote for the correct base. If the light is emitting from the remote, but not controlling the base, please proceed to pairing the remote.
- Pairing the remote: Ensure the batteries are installed in the base, then press & hold the the switch under the base for 3 seconds so it turns on. Aim the remote at the base, then press & hold the up & down button simultaneously until the indicator light at the top of the remote begins to flash. Remove one of the batteries from the base, ensuring the light turns off, then re-insert the battery. Once the battery is re-inserted, the base light will flash several times and the remote indicator light will turn off to signify the successful pairing.
- If pairing wasn’t successful, you can remove the batteries from the remote control and base and try again. If it continues to not work after multiple attempts, please contact aftersales.