Category: Model kits

Desura II Core Ship – Battleship Yamato 2199

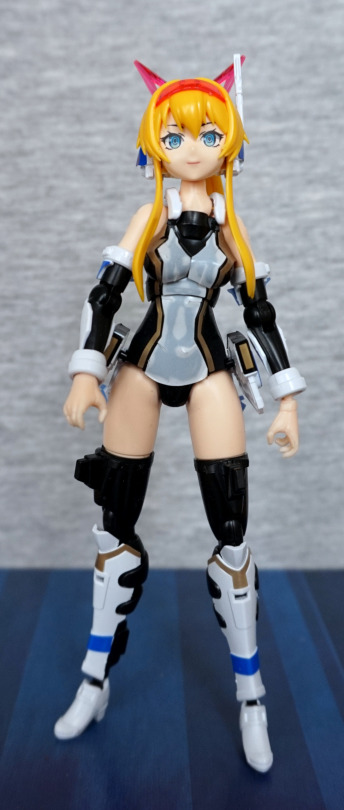
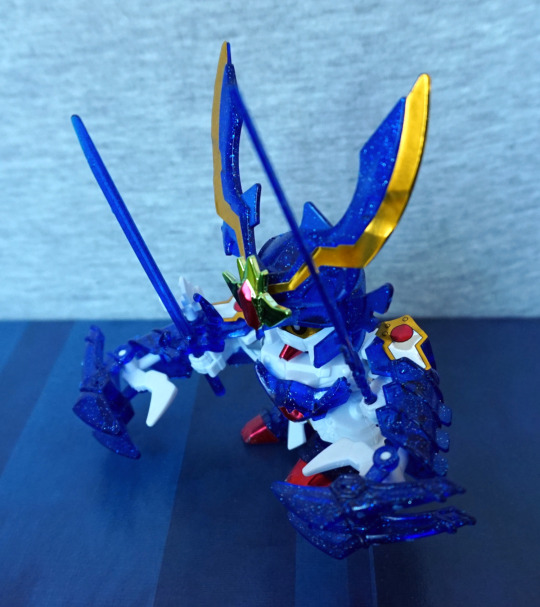
Now for a model kit! This is the Desura II Core Ship, with a couple of support fighters. 

Let’s first look at the core ship itself:

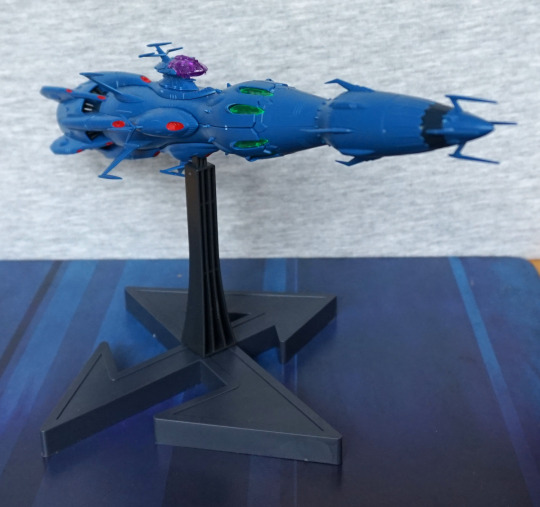
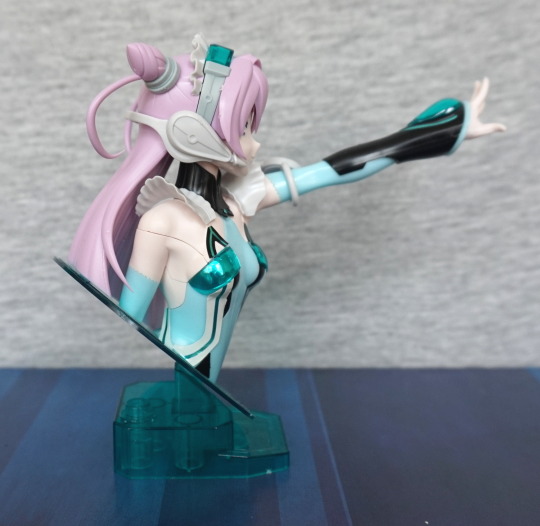
‘tis a long bugger. And spiky! If you hit it, don’t be surprised if you go “ow” and a part flies off. However, I do think it looks cool and worth the pain :P. 

Building it wasn’t too difficult – the instructions were reasonably easy to follow, and the build process, from what I recall, was pretty smooth. 

Left:

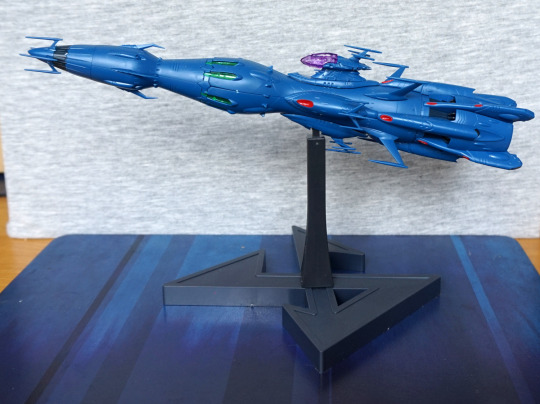
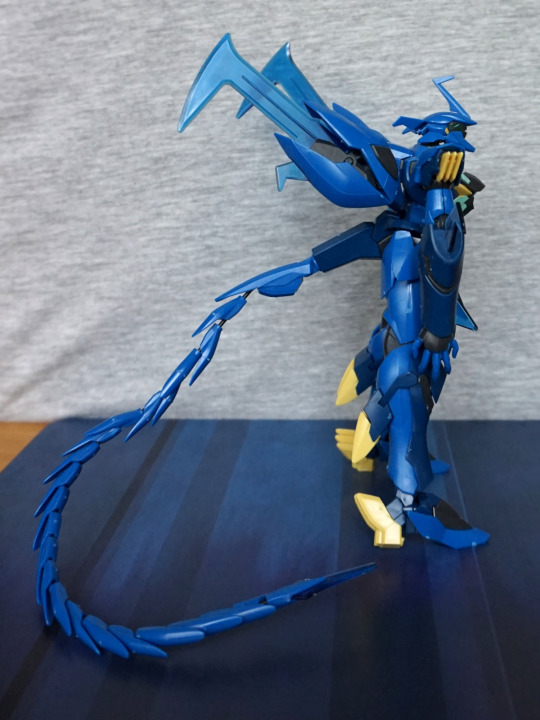
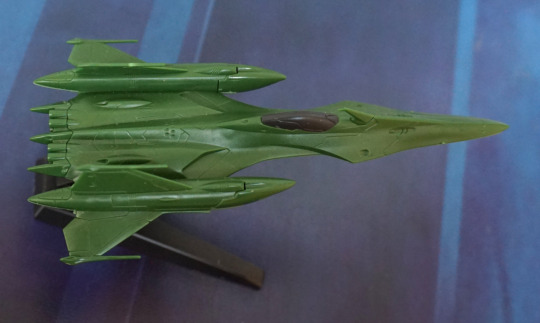
Here’s a side shot to admire it in all its glory. I love the profile of this ship, which is why I bought it… despite having not yet seen Battleship Yamato. It is on my “to watch” list, though. 

Now to deviate from my standard walk-around, and look at this thing from bow to stern. 

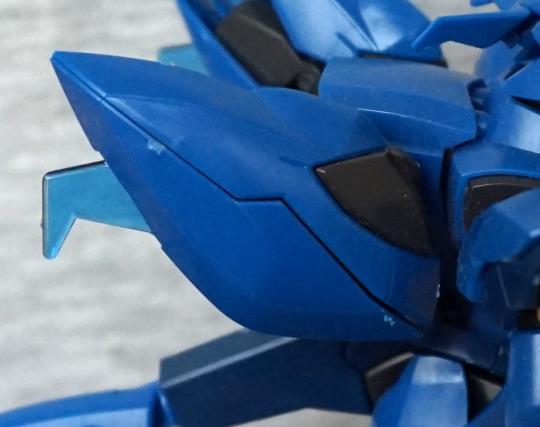
So let’s start with the front end:

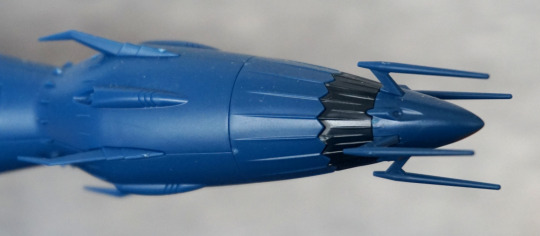
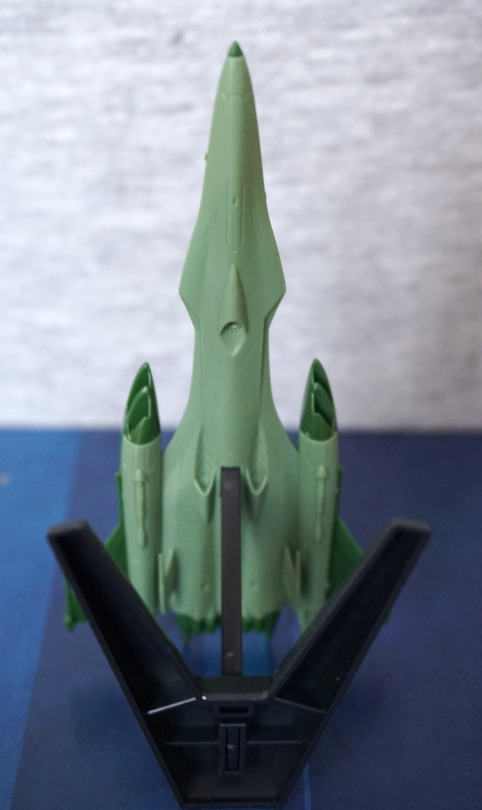
Here we have the stabby forward parts. The sculpting is nice on this model, adding details into what’s a largely plain-coloured vessel. 

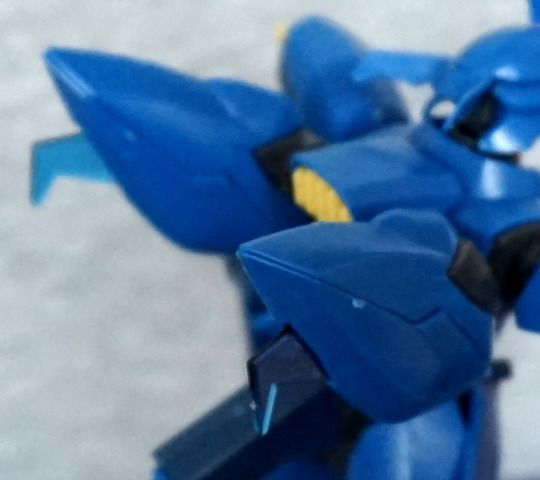
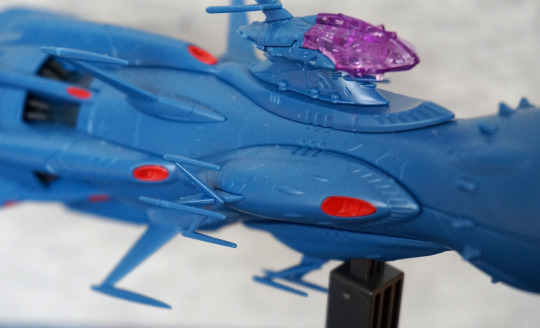
Moving further back:

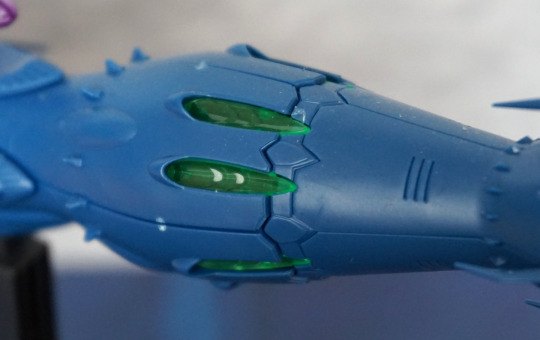
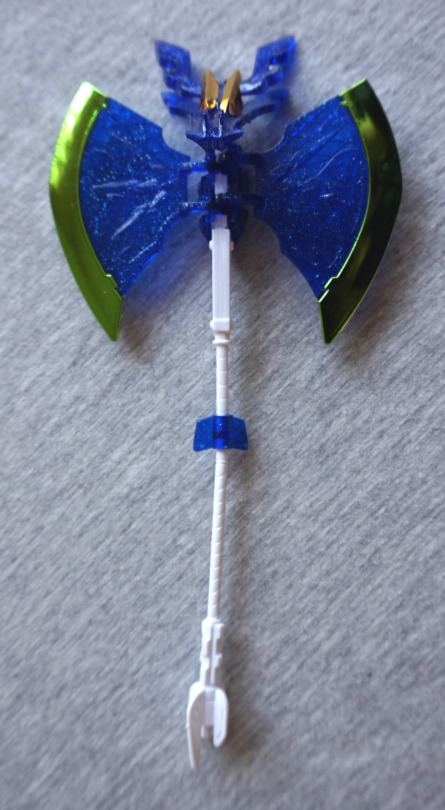
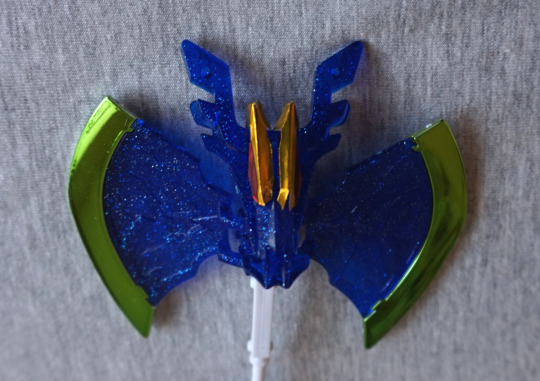
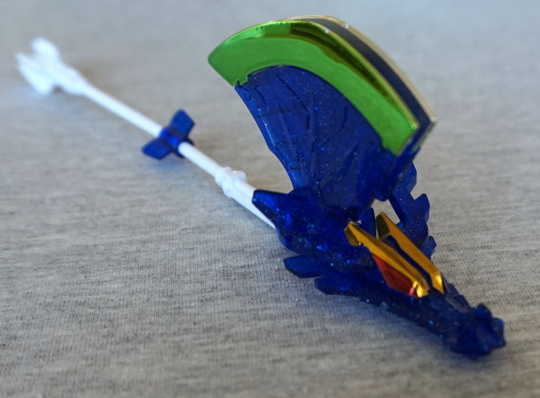
We have some clear parts here, which look nice. There are some transfers that you can add to these bits, to add a bit more detail, but I haven’t done so as of yet. I do like this bit of colour – looking at pictures of the ship from the anime, these parts glow. I could see someone modding this kit, so they could put an LED in this section, though I do believe these parts do back onto blue plastic, so it’d be a relatively hefty mod. 

Cockpit area:

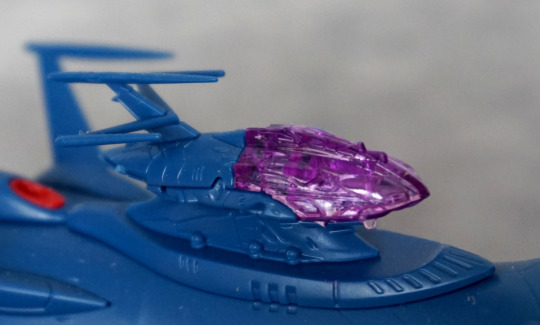
One thing that mildly disappointed me is this purple plastic bit doesn’t push up into a blue plastic “cutout” part, so if you want it to look like the pictures, you need to paint this part. Kind of a shame, as I don’t think it’d be too hard to render a part this could push up into. But if you’re not going for anime-accuracy, you could leave it like this. 

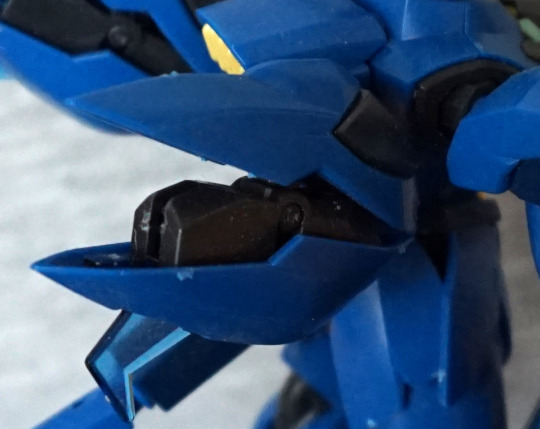
Part below the cockpit:

And these are the spiky bits that tend to spike you and fall apart. The vertical “M” part slots into the one that attaches to the ship, so it’s pretty easy to accidentally knock out. Have had issues with these when positioning the ship on the stand. I do like the red detail parts though. 

Engine fins:

I do rather like this detail, and it has been rendered well. 
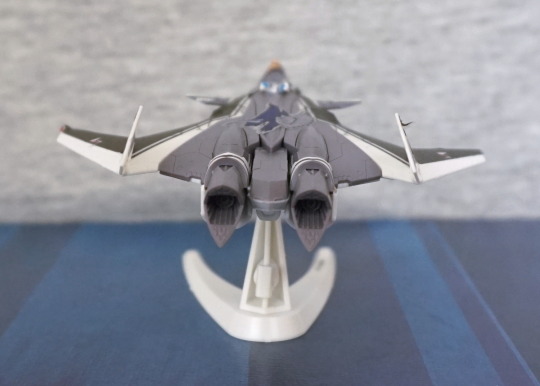
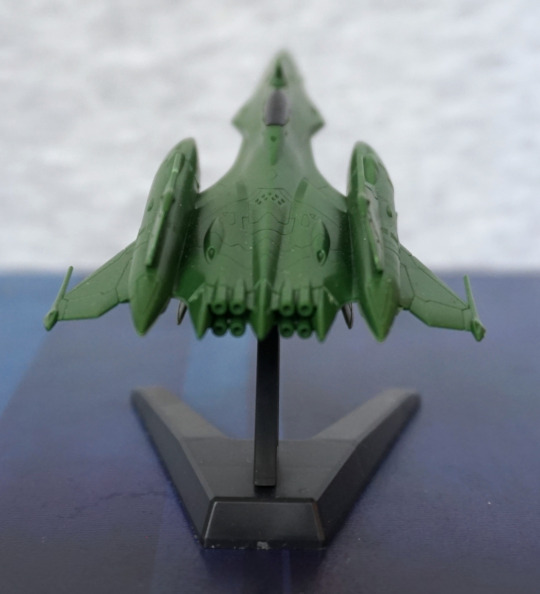
Back:

The thrusters look cool, and and I love all the little details back here. What’s less cool is two of the four fins you see here didn’t fit snugly into their slots and kept falling out. Ended up shoving a bit of White Tack onto the part that goes inside the fin, and that fixed that issue. So I’d recommend doing something similar, or glue these parts. I think the inner ring is supposed to help hold these parts in but… it doesn’t. 
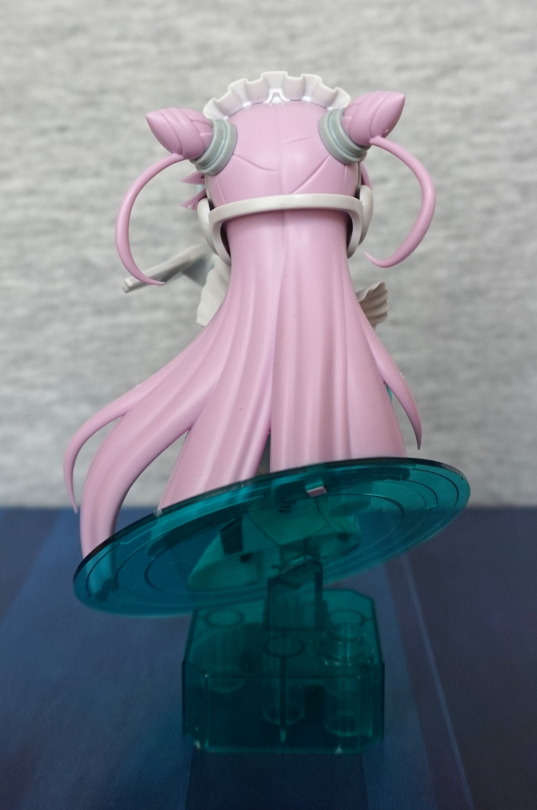
Base:

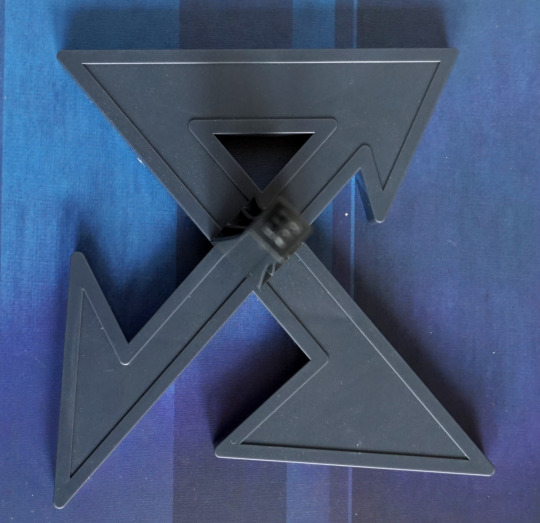
This is the logo for the “owners” (Great Garmillas Empire) of the Desura II… only apparently this isn’t the right way up for it. Ah well, I tried. Stand does a decent job of holding the vessel, but one of the prongs can foul on the base, so you can’t freely tilt it, but you do have a reasonable choice of angles for the ship. 

And that concludes the main ship – I think it’s a cool model, and glad I bought it. Could do with some spots of paint, if I ever get around to painting anything. 

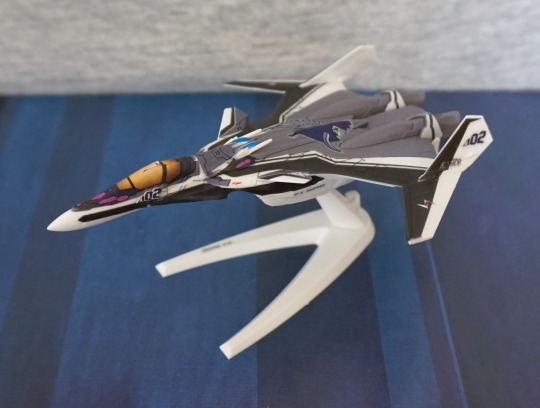
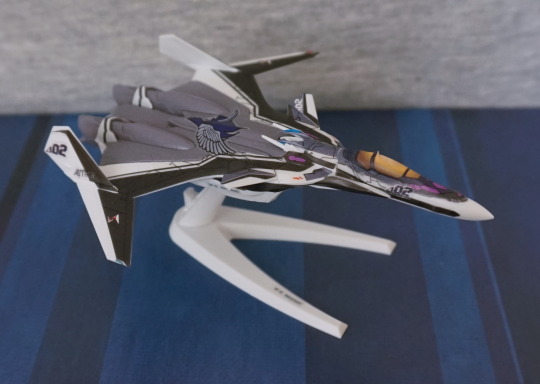
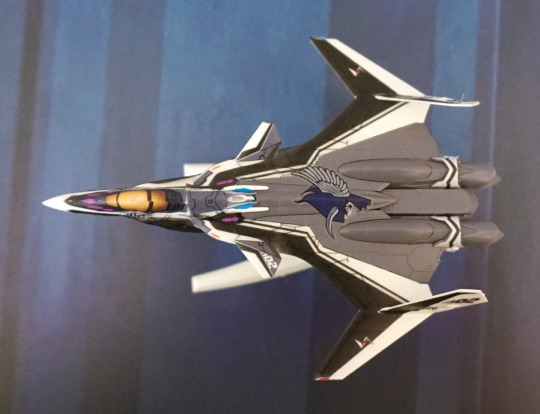
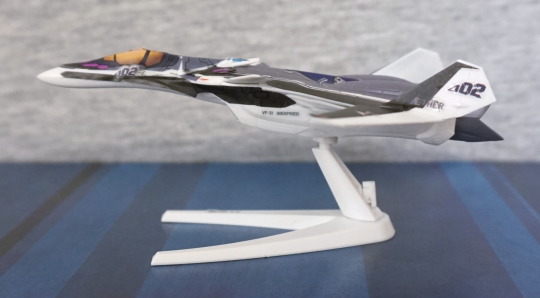
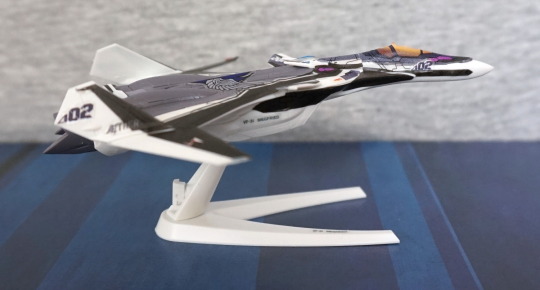
Now for the support fighters:

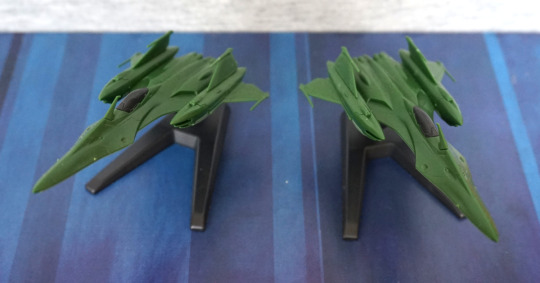
You get two of these, both identical. There aren’t too many pieces making these up, so they should be a quick build.

Quick tour of one of the fighters, as this blog is long enough already:

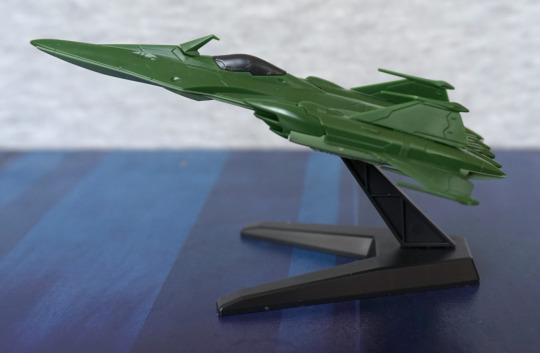
The mould has a decent number of details, so looks pretty decent unpainted. There are some decals that I haven’t put on yet, with the logo fro the Great Garmillas Empire. I think these are a nice inclusion to the kit, and look nice displayed flanking the core ship. One less-good part of the model is the spikes on the fins are easily bent, and this can happen when snipping them away from the sprue. Note one of them is a bit bent in the top pic. 

Some of the bottom of the ship is in the dark green – this would be something ideally fixed with some light green paint, so it looks less odd. Depends if you display these with the bottoms showing or not.

Overall, I’m happy with this model kit, and I should really do some painting, so I can paint the odd bit on this one, as I think it kind of needs it. However, the moulding is nice on this kit, so you could get away with not painting it imo. 

VF-31J Siegfried – 35th Anniversary Cosplay

As someone with an eye for the slightly unusual, this figure appealed. However, let’s start with the less unusual part:

She wasn’t too bad of a built but yeah… those stickers on her chest… They really don’t stick well, and the middle blob is actually her belly button. Yes, they sculpted it, then gave you stickers to cover it… Still considering peeling these stickers off and painting her, as it looks so bad. 

Her face was prepainted, but they give you a blank one, should you wish to paint your own, which I thought was a nice inclusion. 

Side:

I like the fact the hair is articulated, and the pink pieces in her hair. The headset looks good… but the bits on her hips are annoying. Not entirely sure what they’re supposed to represent, but for mine, on one side, it was hard to get it to sit right on the pegs that are there to ensure it articulates correctly. Also the stickers… they like to unstick themselves on this bit. If you look underneath the hip parts, you can see a sticker freeing itself – the parts that fold over on the stickers like to unstick. 

Back:

I like the look of the design back here, barring the escaping stickers. 

For balancing her, it’s a bit tricky with her small feet, but possible. Wouldn’t recommend – was a pain for these photos, so I’d recommend either displaying her with the VF-1 or fabricating some kind of stand/using putty to get her to stay.

And now for the pièce de résistance:

Here she is, riding the VF-1 in Gerwalk form! You initially make the plane in flight mode, but where’s the fun in that? She can be assembled into a walking mode, but it was such a pain to do the transformation, I couldn’t be arsed to change it to see what it looks like – and this is the main downfall of the kit. It pretty easily falls apart, which is so very annoying. The handlebars she’s holding can pop off, and then some of the associated parts can fall off. Some of the wing parts are also easy to knock off. 

The plane form is a bit flopsy from the ability to take it apart and “transform” it. 

And the stickers have the same issues as the ones on her body – they’ll peel and unfurl in places, especially for the ones that fold over a part. If you do want to paint it though, it comes with water decals, so you can use those for the writing after painting it. 

Left:

She does pose reasonably well on it, though getting her legs onto the stands is a bit of a challenge. Here you can see where one of her feet isn’t actually in place. D’oh. 

Right:

And here she is, standing almost properly. The nub on the foot stands does help to keep her in place whilst you pose her. I do like the way the legs are folded out for her to stand on. 

Back:

Booty shot :P. Looks OK from the back, not too much to see here. Getting the entire thing to balance can be a bit of a pain – at certain times, the plane did try to nosedive onto the mat. If you get the feet in the right positions, it should stand up OK though. 

Overall, I really like the unusualness of this kit, and it does look decent when built… if you ignore the stickers peeling off :/. I’d probably recommend this more as a kit that should be painted, rather than stickers due to this. And the not very helpful guide of how to stick them on – some are done during the build process, but the vast majority there’s some large pictures numbering all the stickers at the end – and one of them did require disassembling her to get it on properly. Some parts of the build were a massive pain in the butt, so I’d be prepared for the damn thing to fall apart at least once on you. 

I’d only recommend this kit, if you really want the end result. I wouldn’t class it as a particularly fun kit to build. 

Geara Ghirarga – Gundam Build Divers

This figure I saw on AmiAmi, and was like… yes, I have to preorder that. I really want to build that. 

And build it I did:

Overall, it was a decent build – not too many stickers, I don’t remember any bits being overly complex on the main body. but the tail was fun. Also I probably need to tidy up the plastic nubs a bit here and there… My fault, not the kit’s fault. I do have some better cutters now… 

Left:

Here we have the articulated back parts, which look really good imo, and give the figure some decent depth. Also I like the design detail in the boots – and the yellow accents in general. 

Right:

Here he is, tail half-posed. His head looks menacing, with all the angular parts. I love these little details. 

The blue translucent parts come out of his back like so:

And, even cooler, you can shut them like so:

So need to tidy the plastic nubs…But I thought this was a pretty cool feature to have on a model kit. 

Both of the pods closed:

Some of the kits I’ve built, this would be a choice you’d have to make during building, but I love the fact that he transforms, so you can quickly and easily transform him between “stances”. Credit to the kit designers here!

Back:

Looks very angular from the back, and you can see the leg joints here, but they’re not disruptive to the design of the figure, which I like. The yellow accents contrast nicely.

Close-up of his upper back:

I like this cooling fin detail on this back. 

Tail:

Ahh, the tail. You have to be careful building this – the end segment only pushes on, so you have to be careful not to shove the next fin parts down onto it too hard. And the holes in the fins are only just big enough for them to fit on the wire, so some of them were buggers to get on. And then resulted in me knocking the end off, and then having to start over. You then have to wind the other end of the wire around some parts in the end part, to secure it in place. Adjusting this bit was a pain, and I’m not sure I got it quite right. Also the fins can turn over and go a bit all over the place – see the top of the tail. But the end result does look pretty nifty overall. 

You can also pull his tail off, and he can wield it, but I think I’ll leave it as a tail. If you like his design, I’d recommend giving this kit a go. Just… be patient with the tail. 

Retsuryu – Gundam

And now time to say farewell to the Japan loot with this small model kit of Retsuryu. I wanted to buy a Gundam model kit, as I was in the Diver City mall, but didn’t want anything too big due to luggage space, and I’m not the most Gundam-y person. 

So enter this little fellah:

Yep, was attracted to him thanks to the shiny blue. Can’t go wrong with blue. He’s a cute and colourful-looking dude. From what I remember from the build, he was a pretty easy one to do. Also the end result is pretty cool imo. A couple of the stickers you definitely have to be careful with – especially thinking the eyes and his chin. 

Claws stretched out:

He has a reasonable amount of posing ability, given his actual arms don’t move that much. He rotates at the head and the waist, plus these outer claws can be moved and grab things. 

Left:

Mmm. Shiny. Blue. I like the ribbed effect on his arm, and he’s got some material motion going on in his skirt. 

Right:

Here we see the holder for his axe, which we will look at later. The holder doesn’t work very well though, imo.

Back:

Looks decent enough, but very plain. Might’ve been nice to have a couple of gold/red stickers to put on back here. 

One last look before we move onto the aforementioned axe:

Would’ve been nice if we had some back stickers that matched thematically with the ones on his arms. The green shiny part on his helmet adds a nice central focal point to him. 

Axe:

He has this shiny axe, which you can have a short or a long handle on. This is the long handle mode, but you can remove the blue part and the lower part if you wish. You can then put that part in his hand. 

Close-up of the head:

Yeah, didn’t do the stickers so good here… glad the green parts are painted green. Though only on one side. The box shows the axe coloured, would’ve been nice to have a couple of stickers to add to the front design. Alas, not to be.

He can also fold up the axe:

Which, apparently, lore-wise he can use to fly! Pretty neat, huh? I like the way the axe parts and the dragon head are hinged, so you can do this transformation. 

Overall, he’s a cool little dude, and these small kits are very cheap to buy. These mini-kits I think would be good for beginners – not too many pieces or stickers. If you want to try making a model kit, I think these small Gundam kits would make a good intro kit. The other small kits I’ve done (Mecha Colle ones) have been on the fiddly side, and might be a bit much, but this one was a nice balance of things. Though looking at that axe, reminds me it was kind of a pain to get the green bits to stay put XD. 

EVA01 Test Type – Evangelion – LM-HG 001 Bandai

I couldn’t escape Japan without getting at least one model kit. So here’s EVA-01:

This one was a fiddly mess to build, and made me appreciate more modern model kits. The waterslide transfers were… a fair bit more tricky than I thought they’d be. From the front, he looks OK, but definitely a kit that could benefit from paint. Some of the areas are large and bland, and the blue plate could’ve done with some black dot stickers. 

Head:

Rawr. He’s lookin’ at you. Face looks pretty good from the front, wish there were some black insets or stickers to go on the front green parts. Head itself articulates well. 

Knees:

Just about got these stickers on OK :P. Here you can see the green stickers like to escape a bit. I like the use of colour here, and looks good from a distance. 

Left:

The purple stickers on the fins went OK. Here you can see the green decal didn’t go on too well, but the black ones were OK. From the left he looks pretty decent, and the colours work well. Here you can see some of the fluff stuck on the black parts of his arm already – this is a rubbery part. Not entirely sure why, but it’s kind of annoying due to being a dust magnet.

Head:

The triangular corners could’ve done with fitting on better. I like the green part on the lower arm though. His head looks good, though doing the stickers on his eyes was a pain. The head spike sticker works well though. The black parts on his arms articulate, which helps with posing.

Right:

So… no 1 sticker on this side? Yeahhhh… it didn’t go well and ended up breaking up into three pieces, then one folded over, making it impossible to apply. Shame, because it was on OK, but then I accidentally nudged it with a finger :(. Though the green part at the top fits better on this side. The ribbing that forms his back looks good from the side too. 

Close-up of the transfer that made it:

These ones worked well, once I worked out what I was doing. Still weren’t fun to do, but at least these look great once completed. 

Back:

I like the shapes on the back. Here we have some black inset stickers – much-needed for the back, otherwise it’d look too flat. And we can see a bunch of mould edges – this kit was rather prone to them and I’m too lazy to sand ‘em all off. 

Top of the head:

Here we can see some rather special pieces…

*Ptcffff*:

Here we can eject the entry plug! I like this little feature. And, um, I need to poke that sticker back on… The mechanism is a fun thing, but the little part that goes over the entry plug does have a nasty habit of popping off, and it’s a pain to get back on :/. The fact it has a few moving parts is nice, but could really do with having better ways of connecting! 

He also came with an oversized Shinji (well, a figure to fit that entry plug ain’t happening), which you could paint, but that got chucked in a drawer. It’s beige, doesn’t stand up on its own and looks rather meh. 

Overall, I wouldn’t recommend this kit. The result is OK, but not really worth the effort imo. He did come with some other accessories I didn’t photograph, which could make for good posing opportunities, but they’re nothing particularly special. There’s a big gun, but it can have a habit of falling apart and is plain grey unless you paint it. I don’t have any other EVA model kits to compare him to, though. Maybe get this one if you plan on painting it, as it would be a fairly decent base for that. 

Liko – Active Raid – Figure-Rise Bust

I saw a video of this model kit, and decided I would like it, to continue on with my interest in all things model kit. I’m not familiar with the series, but loved the colour scheme, and thought she was cute. So here she is:

Not the easiest thing to take a picture of, due to her outstretched arm. And those dot stickers on her collar were in the right place when I built it *goes to fix it*. 

With this kit, the things that attracted me to it was the face, the base and the colour scheme. I love the way they have done injection moulding for her eyes – they’re actually constructed from plastic, rather than being stickers, which gives them a fantastic finish. And no need to worry about getting them crooked! My main issue with the kit was getting the flesh-coloured parts of her body to sit well together – here you can see the bit at the front is still a bit gappy. Other problem was the stickers – some of them didn’t quite seem big enough – main pain-in-the-backside are the ones above her chest – those V-shaped stickers seemed too small for the space they fit in. 

Left:

Here you can see some of the details on her sleeves, which are nice. Here you can see one of her body seams – they’re just kind of butt-ugly. She looks fine from the front, but the seams kinda make other angles a bit “eh”. Her hair flows nicely though,and I like the frill she has on her headband. Maybe I could go for a partial disassemble and sand down those bits of the sprue, but not sure it’s entirely worth it. 

Right side:

Another weird seam here. I do like the way she “projects” out of the base. Another interesting thing about this base is you can attach it to a Bandai stand, along with the mecha that goes with her. Probably won’t get the mecha though. 

Back:

Here we can see her flowing hair, which I think looks good. 

Top back:

A closer look at those unusually-shaped hair buns, which give some personality to the figure. You can also rotate them, to get her micro-pigtails at whatever angle is preferable to you. 

Bottom of the back of the base:

Here we can see how she is hollow and attaches to the stand. Getting the disc into the correct orientation was… fun. There wasn’t much guidance of how it was supposed to go, but some trial and error later, I got it. She attaches firmly to the stand, so not concerned about her dropping off or anything. The way her hair connects to the stand means her head does not articulate though. 

Above:

I love her sleeve. All of the translucent green pieces have silver stickers underneath, which help the green bits “pop”, which adds to the figure. Her arm at the white armband is a bit easy to knock apart though. Did knock her arm off mid-assembly, oops. 

Overall, I like this model kit. It wasn’t too hard to assemble, but I don’t think I would’ve paid a lot for it. If you find this cheap, and like the end result, I could recommend it, but kind of has limited display angles, due to the way the seams are, unless you really want to get some model putty and paint out. 

Tiger – Tiger & Bunny – Figure-Rise 6

And what would Bunny be without Tiger?

This one, the stickers were easier than Bunny’s I felt. Especially as the ridged ones sit in the ridges. Main downside of the stickers on this one is the leg stickers are prone to peeling on the pointy bits. The bits that go over his shins are two pieces, which is why they peel back from the edge, when clipped. Second annoying thing is his hips don’t like to be straight, and he seems to like to stand with a slight wonk at all times. Like Bunny, I find he looks impressive, and articulates well. 

Left:

Love the armour on his lower arms, and the angular armour on his lower leg. And a wonderfully pointy face. 

Right:

The lines add a lot of detail to his legs, but with them being several stickers, it was a bit of a laborious process sticking them all on. Worth it though! Not so worth it: Those white arm stickers. I don’t find they lie particularly well on the moulded plastic. 

Back:

Love the lines on the backs of his legs. The back shoe stickers were a pain though, as they’re a rounded blob that you have to sort of try and smooth them onto. There are some cuts in the sticker to aid with this, but not sure how much they helped. He also has a hidden peg hole, underneath a piece on his spine. I like the way this part blends well into his back, but it does have a protrusion, so it’s easy to remove with just a fingernail. 

Overall, these figures were mostly fun to build. Did make some mistakes along the way, but these weren’t too hard to rectify. Am pleased with the end result, and was worth it. If you want to kill an evening and end up with a nice-looking action figure, these kits may be for you. 

Let’s say goodbye Tiger:

Thanks for reading!

Barnaby Brooks Jr – Tiger & Bunny – Figure-Rise 6

After making the Black Lotus and Silver Crow model kits, I decided I needed more. After hunting around for something from an anime I was familiar with, I came across Tiger & Bunny. There were two versions – I chose the “Style 2″, as these ones looked nicer than the original counterparts. Doing the research for this blog, I think I made the right choice, but these ones were the far more involved to build, owing to the number of stickers they have. 

So, let’s see what the end result looks like:

I think he was worth the effort, and came out really well. The articulation is good too, and you can do a range of poses:

Here he is, running into battle. Or stopping Tiger from doing something stupid. The stickers, once on, work really well and give the figure a decent amount of detail. I love the blue shiny stickers. The downside of doing Barnaby’s stickers was that most of them sit on top of the ridges, meaning they’re hard to get in place. This is due to most of these areas having a coloured border. 

Left side:

Love the clear areas on the armour. His head has a good shape, and his head “fins” look neat. Also love the way the side of the legs turned out, where the colours work well together. 

Right side:

Not too much different from the left. Looks good 🙂

Back:

Love the wings/jets on his back. The detail of the red plastic behind the clear plastic works really well imo. Here you can see where some of the sticker son the back of his thighs didn’t quite sit right on the ridges. Annoying. And one of his butt stickers has since walked off :/. Not sure where that one went, sadly. 

The base of his spine comes out, to reveal a peg hole. I have some bases on order, so I can put Tiger & Bunny in action poses, when I display them. 

Overall, I’m definitely pleased with this figure, despite having to be careful not to nudge the stickers, and the amount of rude words that went into putting them on XD. If you’d like a more involved model kit, I would recommend this. 

Silver Crow – Bandai Figure Rise 6 Model Kit

I ordered this from Suruga-ya… then found I could’ve got it cheaper on Mandarake. Not sure if it was in stock when I first looked. However, I got this for around the same price as the Black Lotus kit, so I don’t feel like I overpaid. 

Here’s the completed Crow:

I do like the look of this Silver Crow. The silver stickers also worked better than I expected, which is a nice touch. The wings do have some plastic flaws in them from the moulding process though. 

Close-up of his face:

His mask is almost a bit too see-through, so you can see he doesn’t have a face. The green bits on his shoulders are stickers, along with anything silver. 

Left:

Though viewing his mask from the side is pretty cool – does look like there’s a head in there from this distance. The wings aren’t poseable sadly, so they’re stuck at this angle, if you equip them. There is the option to display him without them, though, if you prefer. I think the angle is a good choice, so not overly bothered by the lack of movement within the wings. 

Right:

Here I have the blast arm parts equipped – I think these look good. The upper arm needs to be specially constructed, but the lower part simply fits onto her hand. 

From the back:

His back looks good, but his wings… have plastic-saving holes. Would’ve been nice if this part was flat, or had a part to clip onto the back of the wings to cover it up. 

Here’s Silver Crow’s arm in combat mode, without the blast: 

Looks pretty cool and bulky. 

Close-up of the arm with the blast:

The blast replaces the “forked” parts of the bracer. 

Overall, I’m pleased with the result of this kit. He’s decently poseable, but the clip part that allows him to stand on the stand could do with being a fraction taller – he just about stands with this, but it’s a bit of a squeeze. If you don’t want him standing, then you have a few more options I feel. 

Black Lotus – Bandai Figure-Rise 6 Model Kit

Now for the first model kit I constructed. I have done these model kits in the opposite order, as I have some more Accel World goodies coming up.

So, here she is:

In her black, kind-of-annoying-to-photograph form! She wasn’t too bad to build – main annoyance was ensuring I was building the parts for combat mode instead of “normal” mode. Near the beginning I made a mistake, but I was able to rectify it pretty easily. She’s not really swappable between forms – you have to pick one or the other when building. Seeing as I prefer combat mode, I went for that one. Gotta have moar purple and longer swords!

Left side:

The blasts hold reasonably well. They simply wedge onto her blades. Bottom ones can come loose if she gets nudged. The blocks on the back of her legs have two ways they can sit, to show and hide the purple parts. The purple protrusions from her head have black stickers on them, to make them purple and black, and that came out well. 

Right side:

I do like the way the arms came out – they’re really cool. 

Back:

Some lovely lininess going on. The purple part on her skirt was the bit I missed at the beginning – ended up putting in the “normal” mode one, then realising it wasn’t “plug n play”, and I had to pick during construction. 

She also comes with some landing “splash” effects, if you want to pose her, as if she’s coming in to land:

Imo, they look pretty cool, and love the fact they included them:

Here’s a close-up of her head:

In which you can see the three stickers adhered to the fins on her helmet, to make them appear as they do. 

Close-up of her upper half:

I like the shininess of the stickers provided – they really add to the figure, though I balls’d up the gem in the middle a bit. She also has some extra purple plastic accents on her arms and shoulders here, for the combat mode. 

Am really happy with the finished result. She’s articulated quite well too, so you can do all sorts of posing with her too. Is quite cool, building your own articulated kit. Certainly happy with this kit, and will be building more Figure Rise 6 kits in future. 

VF-31F Siegfried (Messer Ihlefeld’s) – Macross Delta – Bandai Model Kit

Now for my new “thing” – model kits! I bought two larger kits from one of my favourite series, and stuck this in on a Mandarake order on a whim. 

After a lot of bitching at stickers later, I had this:

Next time I’m totally going to be using my tweezers to help out with the stickers, and there will be a next time! The pictures were pretty easy to follow, despite me not reading a word of Japanese. You do need to look carefully to work out what’s going on though, if you can’t read what’s being said.

Here it is from the other side, similar angle:

Quite happy with the end result, but I would’ve liked to get that cockpit sticker a bit flatter. It’s amazing how the stickers transform it from being a boring, grey and white plastic model to something quite colourful. 

From the top:

Looks pretty neat from the top. Not sure if the logo is quite in the right place – I did centre the logo on the centre of the plane, but the wing does just touch that black line on the other sticker. Also you can see where the cockpit doesn’t quite align. 

Side shots:

Looks nice in profile. Some very small stickers with writing on, to tell you that it’s a VF-31 Siegfried. One cool thing about this stand is that the peg that goes into the craft is on a ball joint, so you can angle it however you’d like and turn it around. 

From the back:

Engines look OK, though lack of fire :P. The small block on the back of the stand can go into the bottom of the fighter, if you don’t wish to have it on the stand. I love the fact they provided a space for this block on the back of the stand, so you don’t lose it. What I love less is the fact that I ended up putting this block in during the building of this craft, then I had to get some hooked pliers to get it back out again :P. Wasn’t so bad as I had some on hand. I guess the instructions may’ve said something about what it was for, but oops. 

After completing it, I quite like this craft. It is very small (10cm/4″ from the engines to the tip of the cockpit), but it cost me the grand total of £4.08, so I can’t complain about the price. I enjoyed building it enough, that I’ve ordered some more. They’re quite quick to build (at least for a model kit), so if I’ve got an hour or so spare, then I can entertain myself with building one of these!