Tag: gundam

Geara Ghirarga – Gundam Build Divers

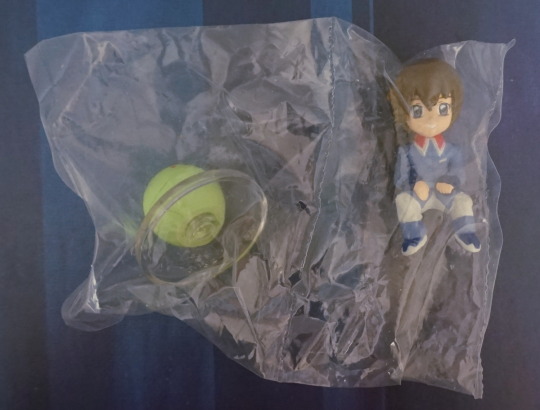
This figure I saw on AmiAmi, and was like… yes, I have to preorder that. I really want to build that. 
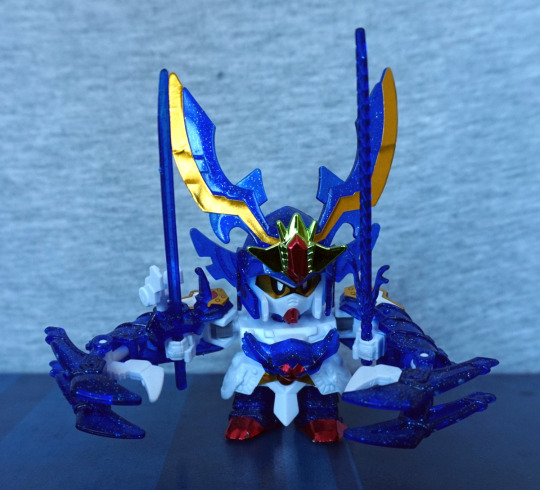
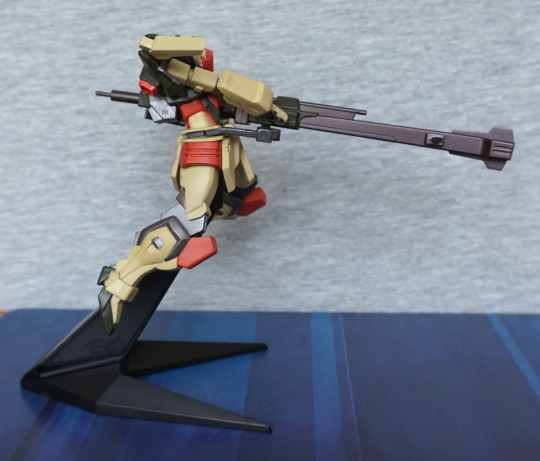
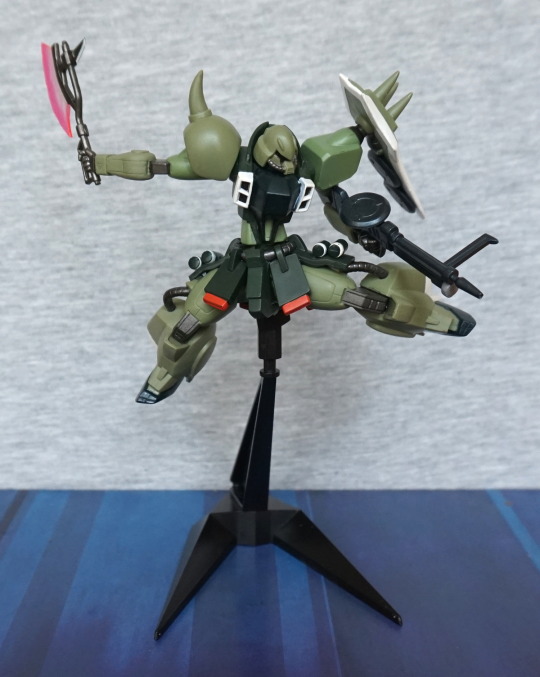
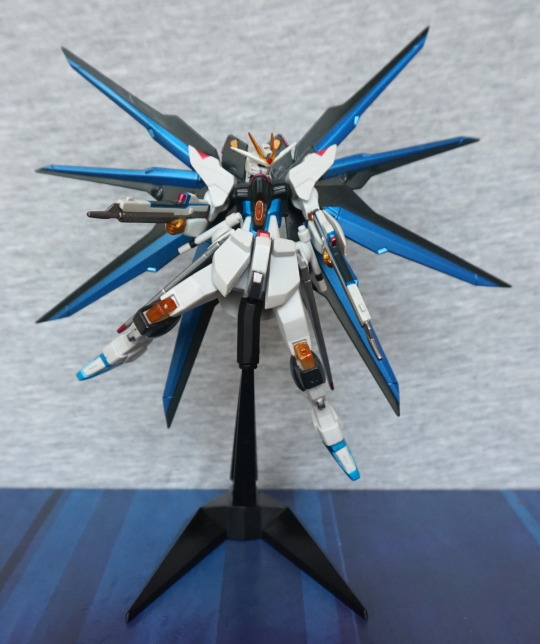
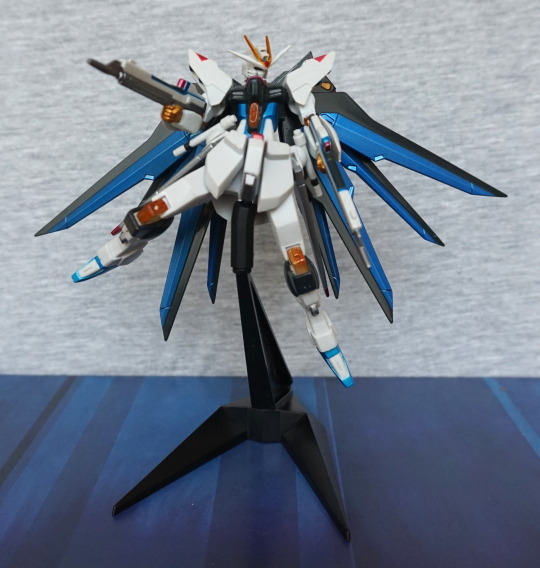
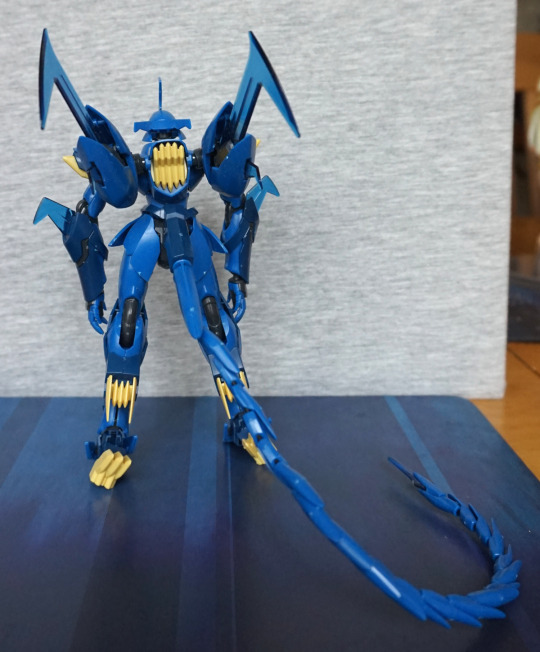
And build it I did:

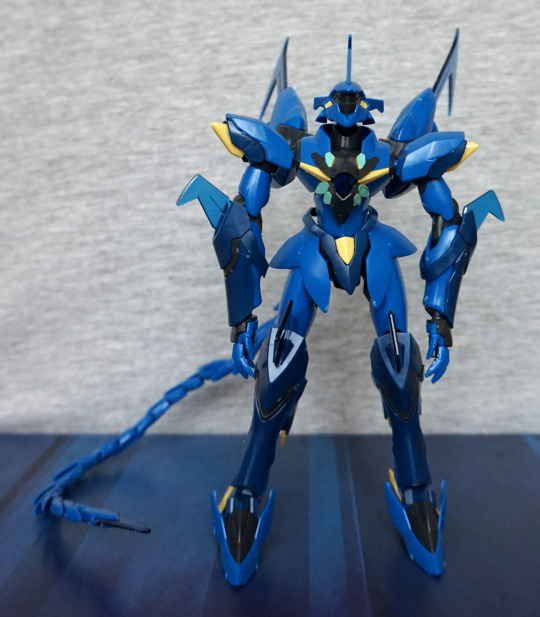
Overall, it was a decent build – not too many stickers, I don’t remember any bits being overly complex on the main body. but the tail was fun. Also I probably need to tidy up the plastic nubs a bit here and there… My fault, not the kit’s fault. I do have some better cutters now… 
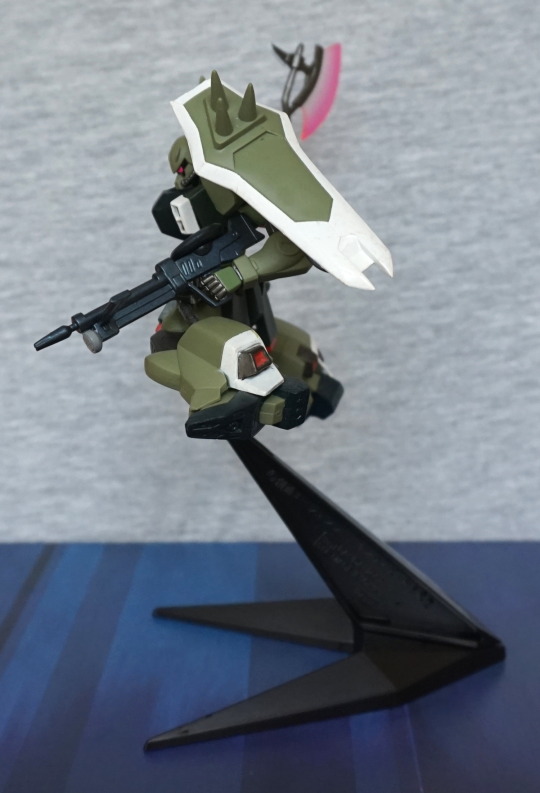
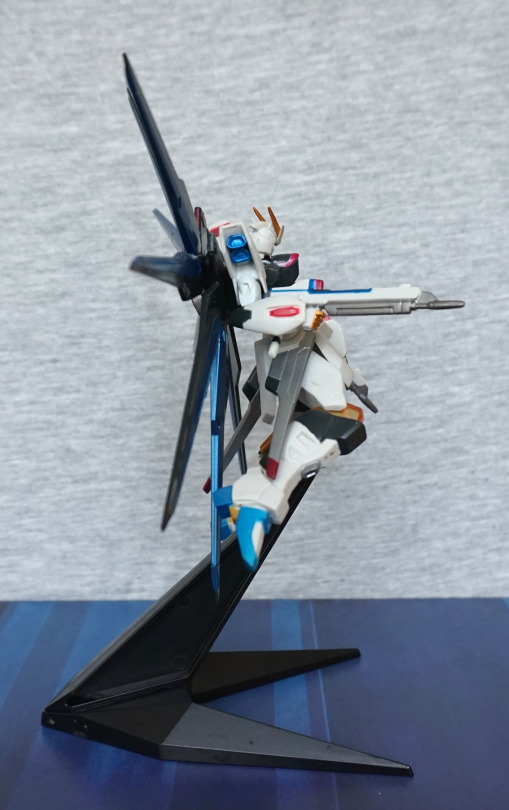
Left:

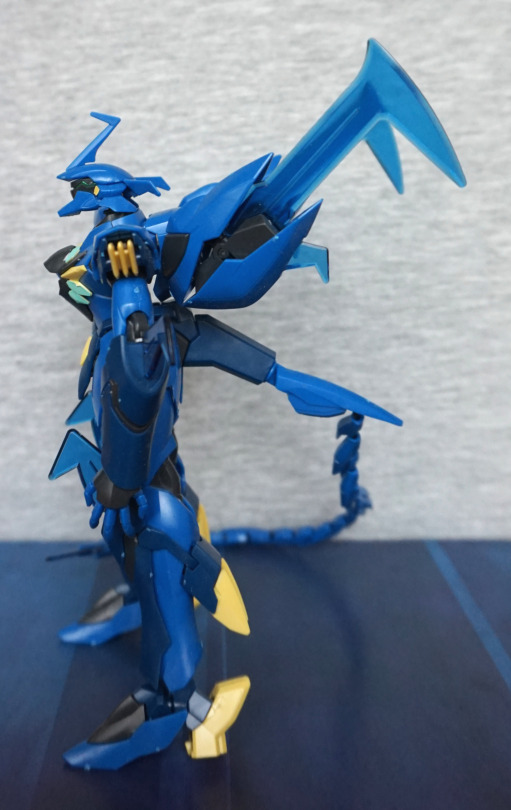
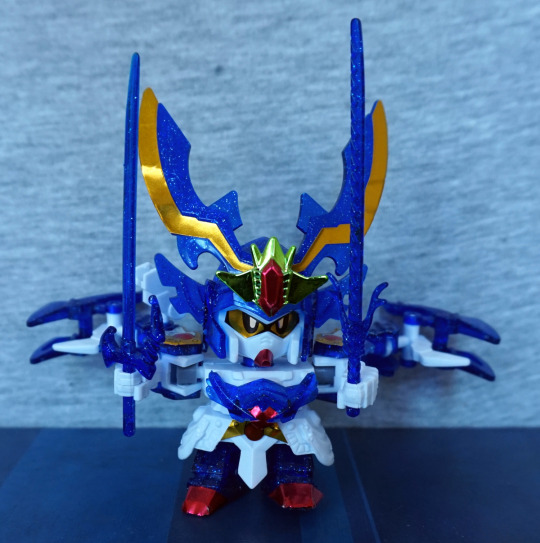
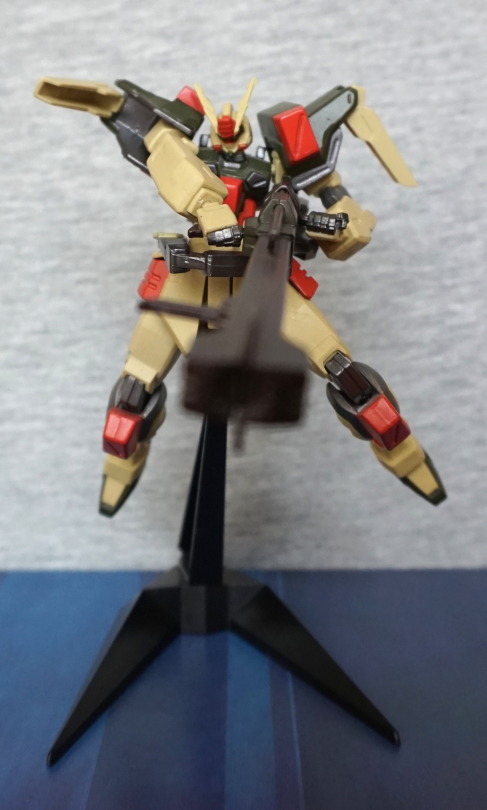
Here we have the articulated back parts, which look really good imo, and give the figure some decent depth. Also I like the design detail in the boots – and the yellow accents in general. 
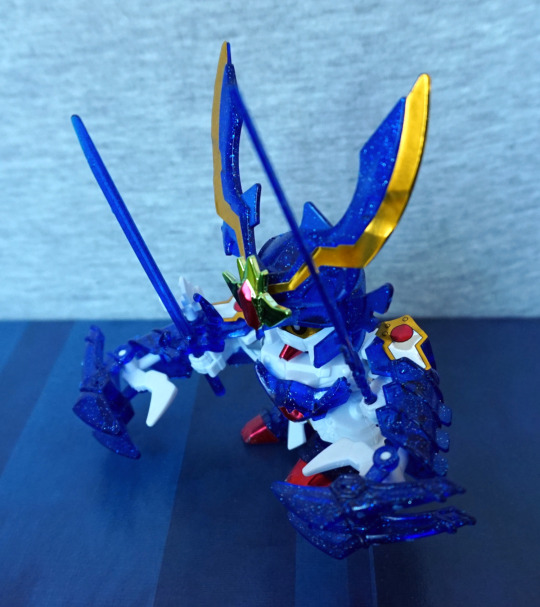
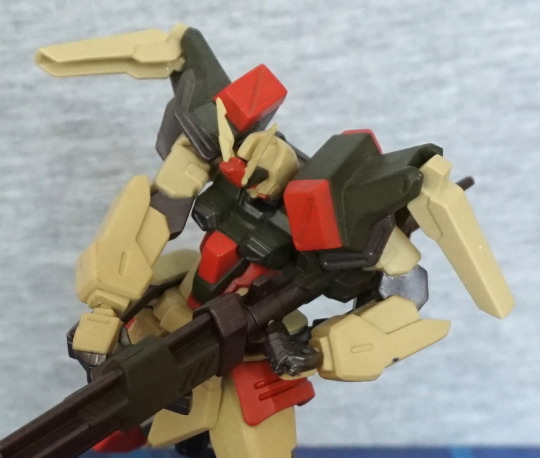
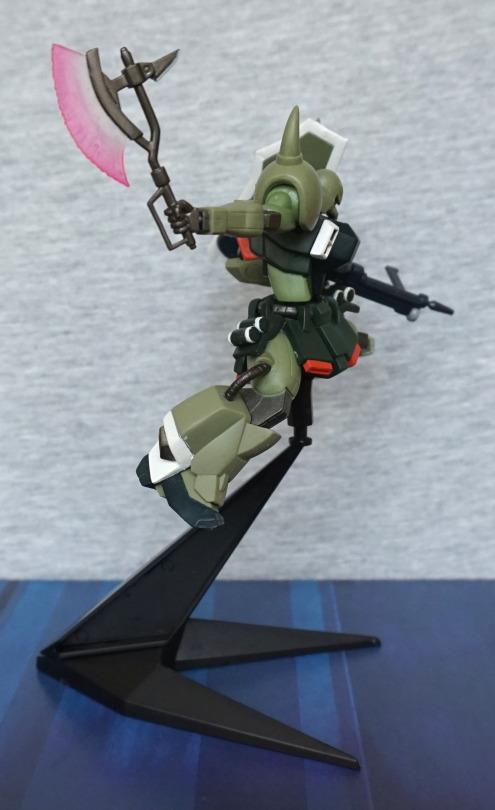
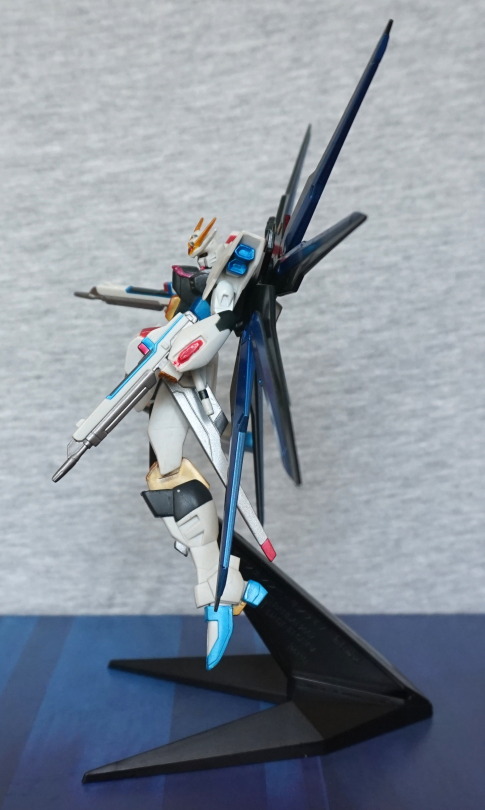
Right:

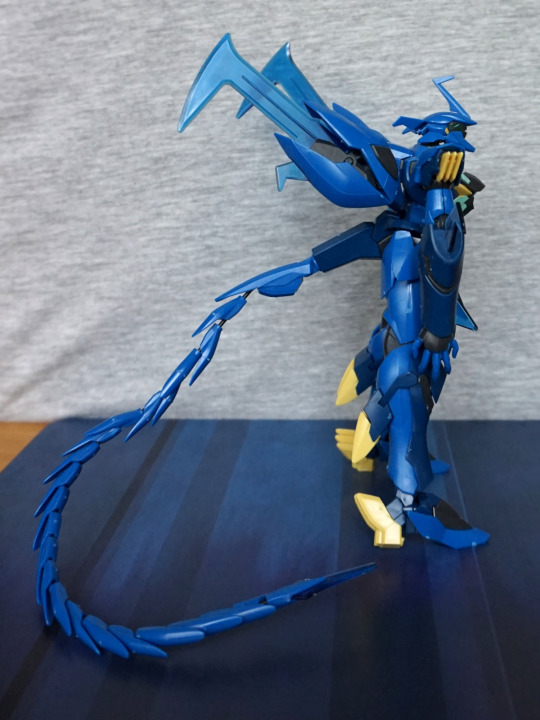
Here he is, tail half-posed. His head looks menacing, with all the angular parts. I love these little details. 

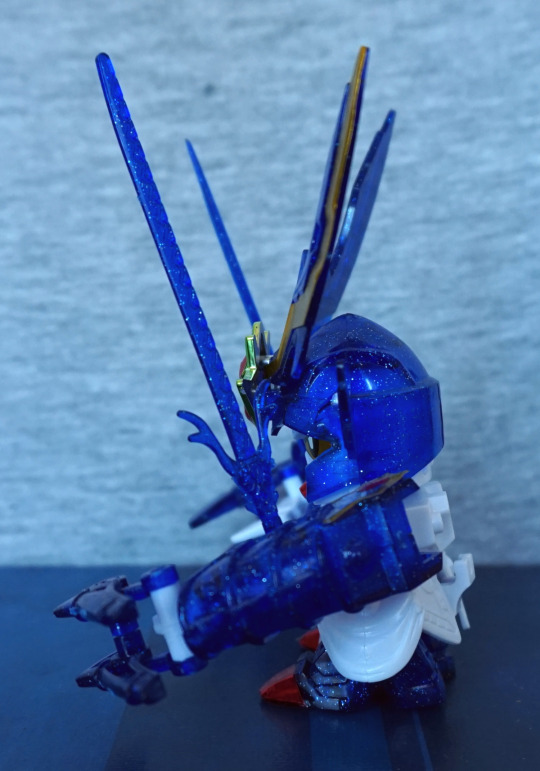
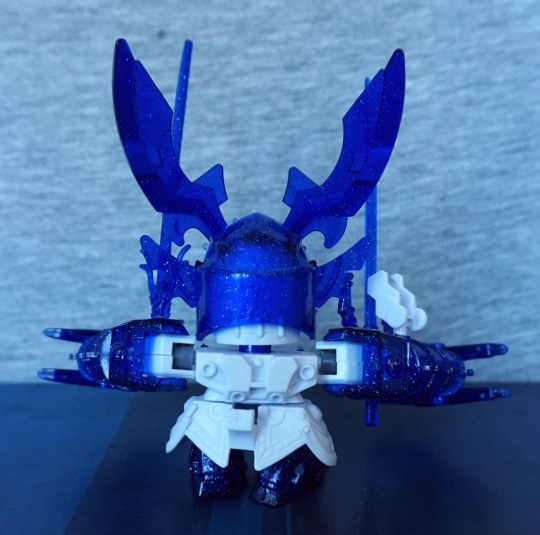
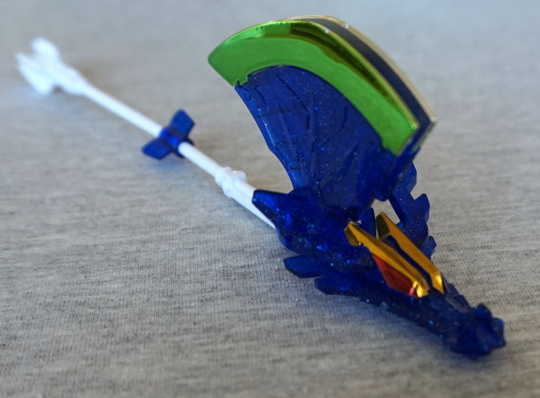
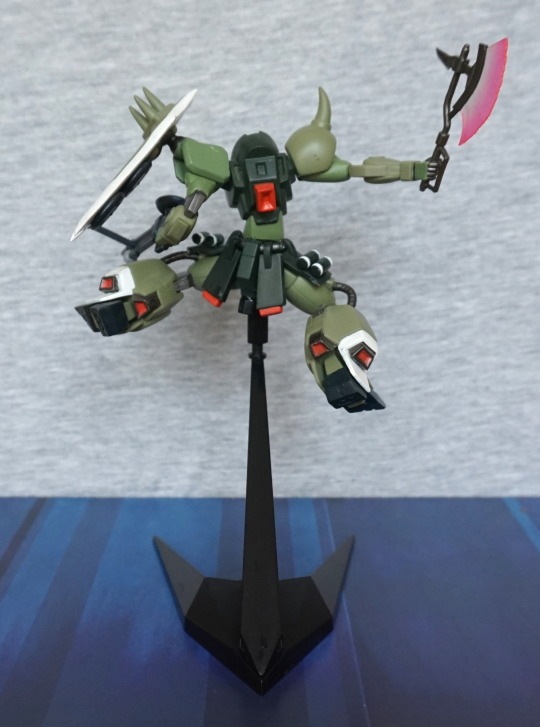
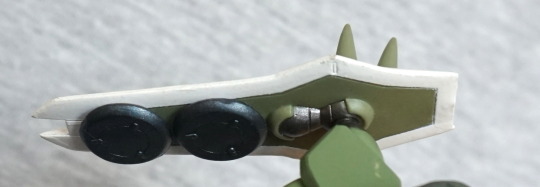
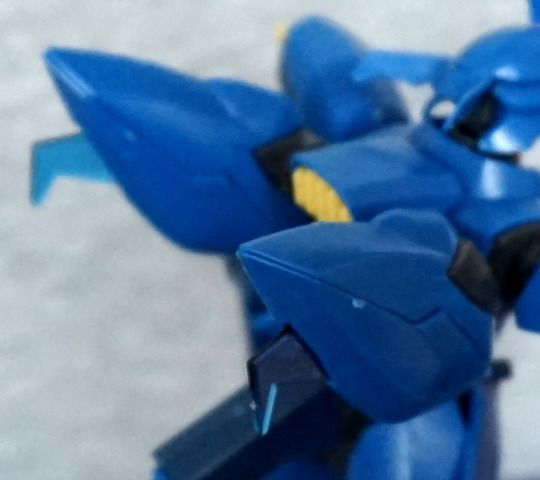
The blue translucent parts come out of his back like so:

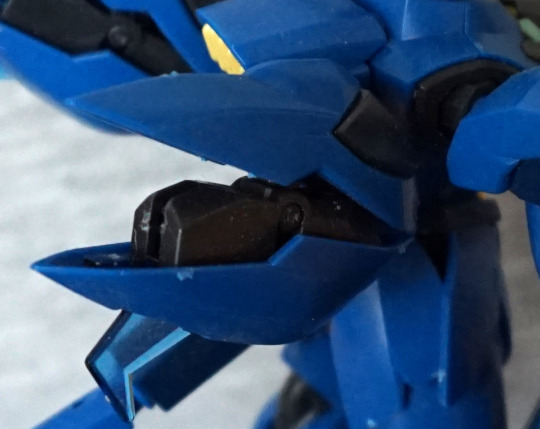
And, even cooler, you can shut them like so:

So need to tidy the plastic nubs…But I thought this was a pretty cool feature to have on a model kit. 

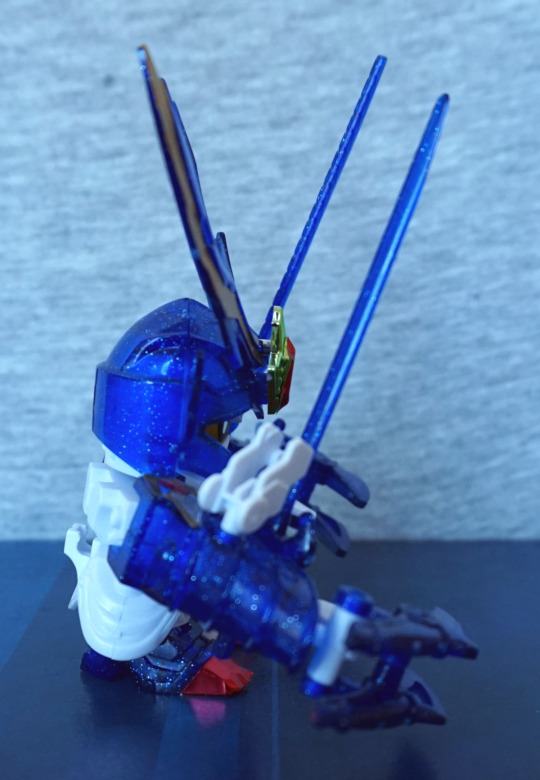
Both of the pods closed:

Some of the kits I’ve built, this would be a choice you’d have to make during building, but I love the fact that he transforms, so you can quickly and easily transform him between “stances”. Credit to the kit designers here!
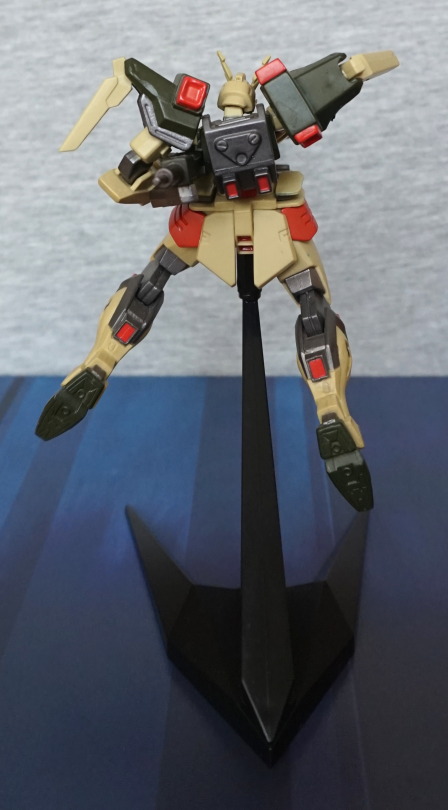
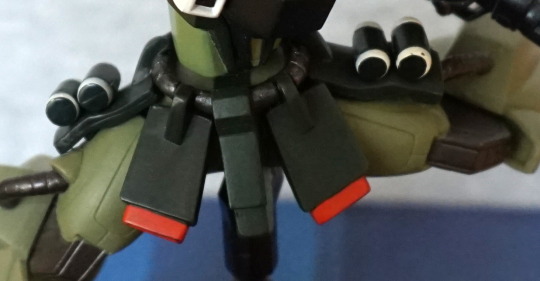
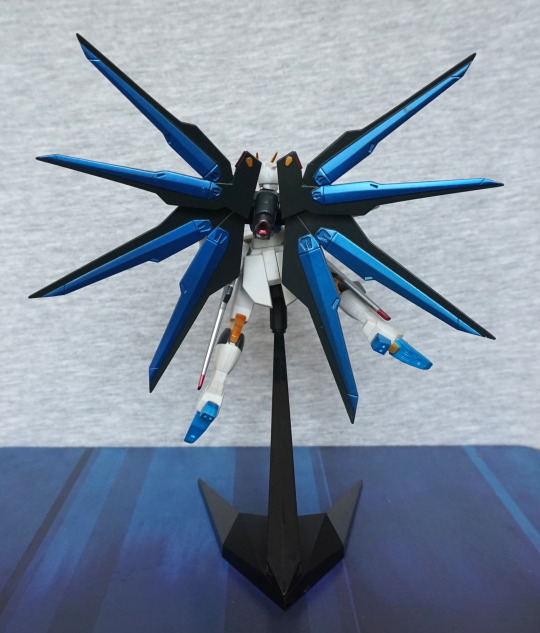
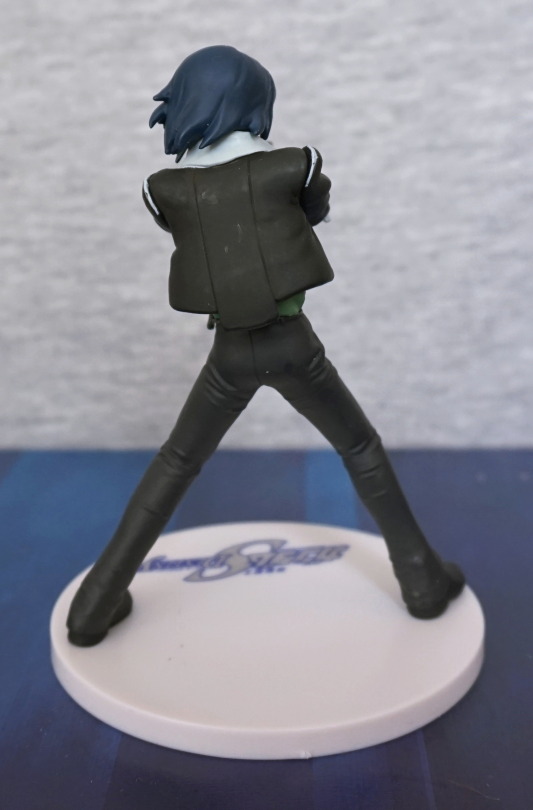
Back:

Looks very angular from the back, and you can see the leg joints here, but they’re not disruptive to the design of the figure, which I like. The yellow accents contrast nicely.

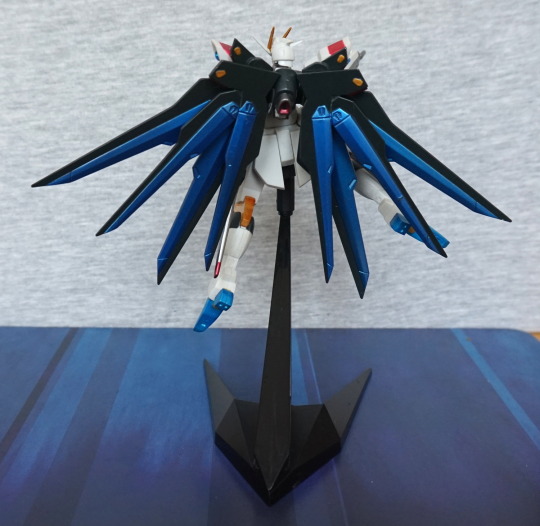
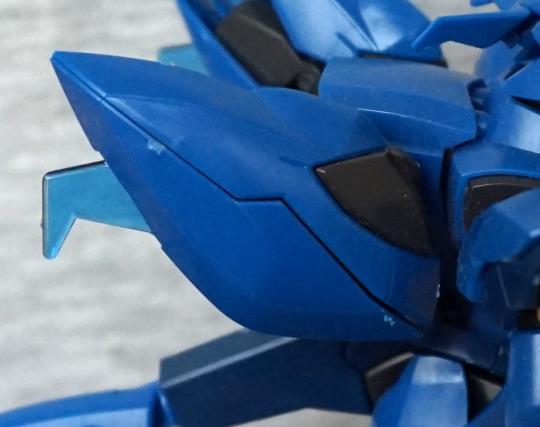
Close-up of his upper back:

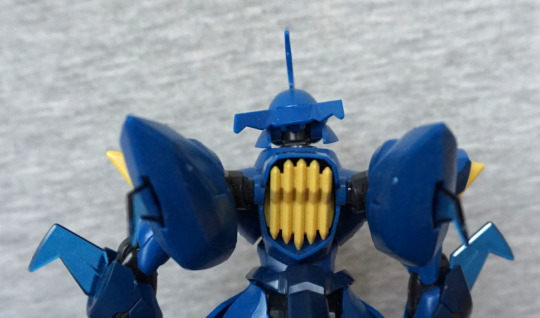
I like this cooling fin detail on this back. 
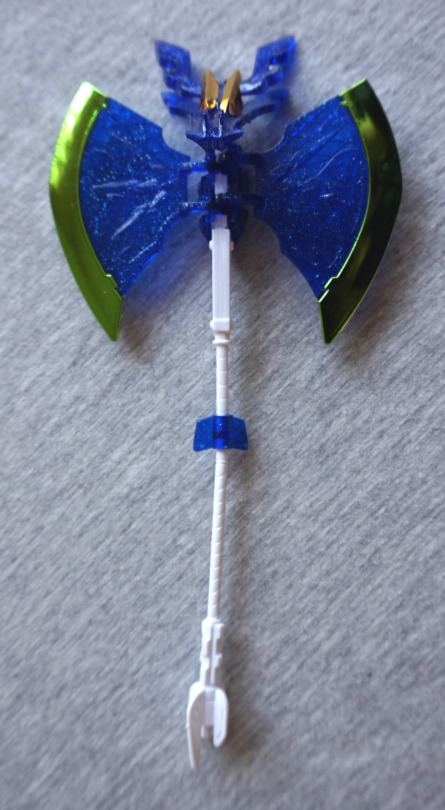
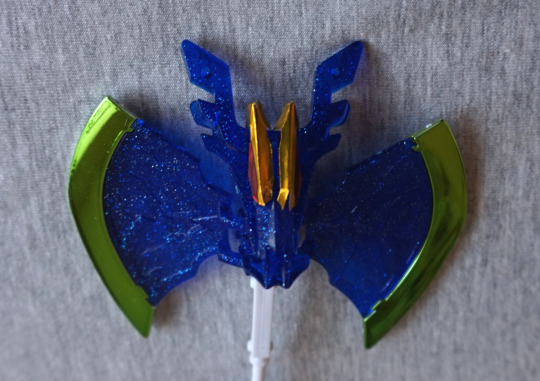
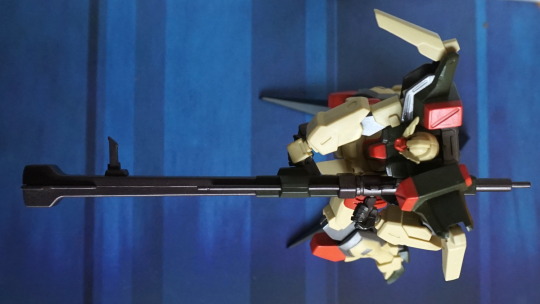
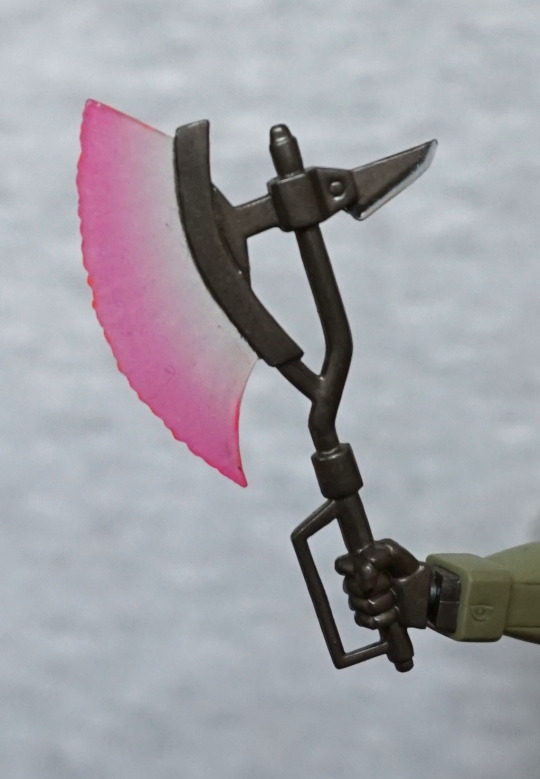
Tail:

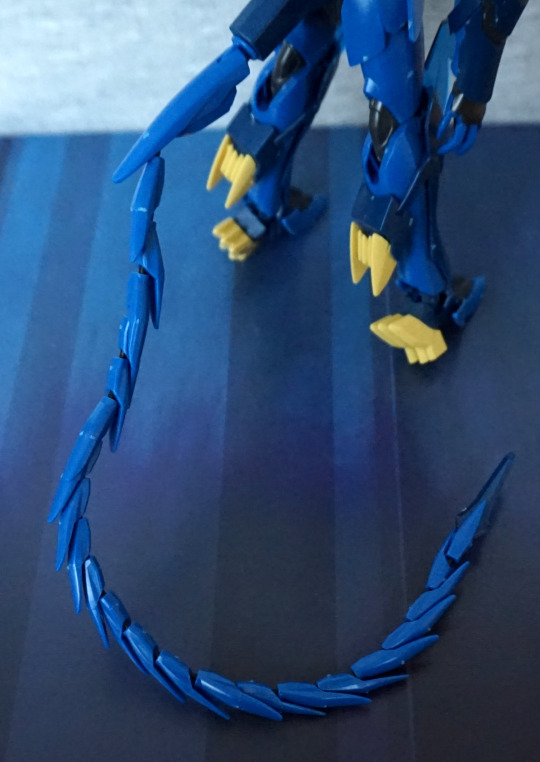
Ahh, the tail. You have to be careful building this – the end segment only pushes on, so you have to be careful not to shove the next fin parts down onto it too hard. And the holes in the fins are only just big enough for them to fit on the wire, so some of them were buggers to get on. And then resulted in me knocking the end off, and then having to start over. You then have to wind the other end of the wire around some parts in the end part, to secure it in place. Adjusting this bit was a pain, and I’m not sure I got it quite right. Also the fins can turn over and go a bit all over the place – see the top of the tail. But the end result does look pretty nifty overall. 

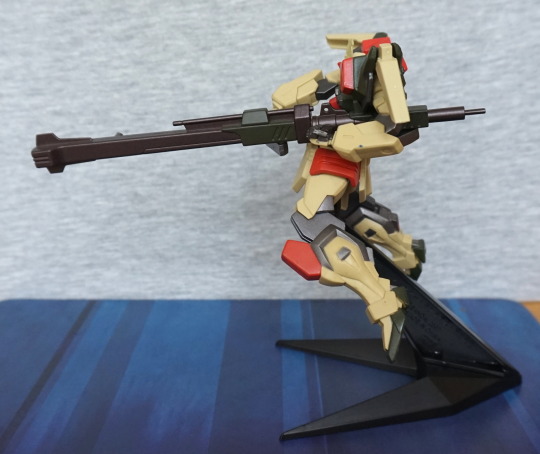
You can also pull his tail off, and he can wield it, but I think I’ll leave it as a tail. If you like his design, I’d recommend giving this kit a go. Just… be patient with the tail. 

Retsuryu – Gundam

And now time to say farewell to the Japan loot with this small model kit of Retsuryu. I wanted to buy a Gundam model kit, as I was in the Diver City mall, but didn’t want anything too big due to luggage space, and I’m not the most Gundam-y person. 

So enter this little fellah:

Yep, was attracted to him thanks to the shiny blue. Can’t go wrong with blue. He’s a cute and colourful-looking dude. From what I remember from the build, he was a pretty easy one to do. Also the end result is pretty cool imo. A couple of the stickers you definitely have to be careful with – especially thinking the eyes and his chin. 

Claws stretched out:

He has a reasonable amount of posing ability, given his actual arms don’t move that much. He rotates at the head and the waist, plus these outer claws can be moved and grab things. 

Left:

Mmm. Shiny. Blue. I like the ribbed effect on his arm, and he’s got some material motion going on in his skirt. 

Right:

Here we see the holder for his axe, which we will look at later. The holder doesn’t work very well though, imo.

Back:

Looks decent enough, but very plain. Might’ve been nice to have a couple of gold/red stickers to put on back here. 

One last look before we move onto the aforementioned axe:

Would’ve been nice if we had some back stickers that matched thematically with the ones on his arms. The green shiny part on his helmet adds a nice central focal point to him. 

Axe:

He has this shiny axe, which you can have a short or a long handle on. This is the long handle mode, but you can remove the blue part and the lower part if you wish. You can then put that part in his hand. 

Close-up of the head:

Yeah, didn’t do the stickers so good here… glad the green parts are painted green. Though only on one side. The box shows the axe coloured, would’ve been nice to have a couple of stickers to add to the front design. Alas, not to be.

He can also fold up the axe:

Which, apparently, lore-wise he can use to fly! Pretty neat, huh? I like the way the axe parts and the dragon head are hinged, so you can do this transformation. 

Overall, he’s a cool little dude, and these small kits are very cheap to buy. These mini-kits I think would be good for beginners – not too many pieces or stickers. If you want to try making a model kit, I think these small Gundam kits would make a good intro kit. The other small kits I’ve done (Mecha Colle ones) have been on the fiddly side, and might be a bit much, but this one was a nice balance of things. Though looking at that axe, reminds me it was kind of a pain to get the green bits to stay put XD. 

Urban Mine – Evangelion, Gundam & Misc – Part 5

Now for the final part! I think I got my money’s worth! 

So what’s left? Some Gundams of course! However, before their photoshoot, they needed a bathe:

image

These were quite grimy, and I don’t think the slightly rubbery plastic helped matters. I had no idea who these three were, but one MFC post later, I’d been linked to the who, and a Discord message later, I knew what figure series these are from. They’re pretty old, so they’re not on MFC at the time of writing, and I haven’t got around to adding them (if I will!). These three are from the “Styling S” series. These figures feature extremely limited articulation, and seem to be self-assembly. They seem to have been sold in a blind box format, which ties into the fact they would’ve required assembly, and their quality. They needed some reassembly when I got them – they had been spread around the bag during transport, and sadly one part broke. One of the stands was broken, but I suspect this happened prior to transport. I may fix this with a pin, or just glue the stand part to the stand it belongs to. 

OK, enough waffle, make with the figures!

GAT-X103 Buster Gundam:

image

This is the dude with the broken park – one of those beige pieces on his shoulder is now permanently glued in. I initially thought he had missing pieces, but I found some images of him on the internet, and got him assembled properly! And that’s a gun and a half he’s pointing at us! 

From the left:

image

Yeah, don’t want to be on the business end of that thing! One dirt spot remains on his arm there ¬¬. Erm, do Gundams go in the car wash…? How does one wash a Gundam normally? 

Right side:

image

Here you can see one of the hip mounts for the gun – this was the main mistake I made when reassembling him – I didn’t know what these bits rested on, and didn’t manage to connect the dots. 

Back:

image

As these have stands up… well, erm, there, you get to see the details on their feet, which is nice. Some detailing on the back, equal to the front. 

Top:

image

Nice, sturdy grip goin’ on with that gun. And it certainly needs it! Still damn big!

Close-up of his chest:

image

His head is permanently in “aiming gun” direction. No head articulation, so you can’t have him grumping at things. The poses are cool for these figures, but sometimes… I just want to tweak things a little bit… But that’s not an option with these. 

Now for ZGMF-1000 ZAKU Warrior. This guy is the one with the broken stand, so he’s borrowing GAT-X103′s for these photos. Some of the original stand peg is in his arse peg still, so he sits a little proud on the stand:

image

Here he is, ready to go hammer and tongs on something below him. 

Left side:

image

Here is his spiky shield and gun. From this angle, he could almost be going for a poop. 

Right side:

image

That better be an energy axe! I like the way they have him angled, ready to strike.

Back:

image

Looks OK form this angle, with flaps protecting his backside. These flaps are attached on with hooks (along with the two on the front), and can be reasonably easily knocked off, but they stay happily, so long as you don’t bump them. 

Close-up of the axe:

image

Yep, that looks like some kind of futuristic energy axe. Better not get too close to him! The gradient effect is nice on the “blade”. 

The shield has some details on the back:

image

Guess he’s ready for some discus? 

Midriff:

image

Here’s a close-up of the flaps, and some grenades he has on his belt. Those crown jewels are safe… so long as those ‘nades don’t go off prematurely. I do like the detail in this area. 

And lastly we have ZGMF-X20A Strike Freedom Gundam. Yep, just rolls off the tongue! 

image

This is my favourite of the three, and certainly is the most striking. I love the “wings” on the back, and the general colour scheme. He’s also dual-wielding guns, so that’s also a win. 

Right side:

image

Not too much to see here, looks like he’s got holsters for those guns. 

Left side:

image

More of the same. Bit of some red smudging on his arm though. Loving the colour scheme still.

Back:

image

His wings look really impressive from the back. 

This one actually features a small amount of customisation:

image

The upper wings have two positions they can slot into! This option looks nice, but I prefer having him with his wings out. Here’s what this configuration looks like from the front:

image

Not as visible, but I can see some people preferring him looking like this, so it’s nice that they included this option. I don’t particularly like the way his head is fixed so he’s looking down and left – it fits with the flying left pose but I’d like to see his face from more front-on. 

All in all, these figures are OK. They’re nothing special, but they’re competent. The moulds don’t feel particularly complex, and the colours are mostly block coloured plastic, with some paint detailing, so they do feel somewhat plain, compared to a fully painted model. If you wanted something cheap and Gundam, these would fit the bill. They’re also far easier to assemble than a model kit – it’s all pegs, so there’d be no sprue-clipping, stickers, and swearing at small parts. I wouldn’t buy these, but as I have them, I will display them. Until I, erm, run out of space again… probably. 

And that’s the last of this Urban Mine! Hope you enjoyed this 4-part series. I certainly enjoyed this loot box, and I felt I got my money’s worth. 

Urban Mine – Evangelion, Gundam & Misc – Part 4

Now for the Gundam items. This blog will only have one figure opened, then an image dump of two sets of petit figures. I haven’t opened the petit figures, as I haven’t decided if I’m going to display them or try to sell them as sets, though neither are a full set. So feel free to skip the blog after Athrun. 

Originally I wasn’t going to open this Athrun Zala figure, but after seeing what he looked like, once unpacked, I decided I liked her:

image

I love the determined pose, and the paintwork from a distance looks good, with complimentary colours. There is some paint slop, if you look closely though. Well, maybe not so closely by the collar. Assembling this figure was interesting, as the pegs are separate, and on a sprue, so I had to go dig up my model snips! Those have been getting some action lately, which will be upcoming in a future blog ;). 

Left side:

image

This figure needs some side shots, to show off the aiming with the gun. The stance is good, and works from all angles. The gun and his hands are one piece, so he’s not in trouble of dropping it – sometimes small figures like these can have real troubles holding accessories. Heck, even bigger ones can have issues! His stance only works for firing a gun, so I think this was a good design choice. 

Right side:

image

Looking good from this angle too. I like the way his hair flows around his ear. Also get to see some shirt, from his jacket flying up from him lifting his gun.

Back:

image

Alas, there’s some marks on the back of the jacket, but at least they’re on the back. These kinds of marks are not uncommon on black finishes on cheaper figures. Kind of annoying, but not much you can do about it, I don’t happen to have any matt finishes on me, lol. 

I love his action-y stance and colour scheme. The logo on the base is also attractive, and adds a bit of class, and is far better than just a plain disc. 

Now for the image dump. This first set of bags are from Bandai’s Petit Figure Collection 1. Names of the characters are on the bases:

image
image
image
image
image
image

The next three are from the Chara Puchi set, also by Bandai:

image
image
image

They’re fairly run-of-the-mill petit figures for the most part. I’m more likely to keep the Chara Puchi ones, as I do like the little Haros the characters are given to sit on. I haven’t watched any Gundam, so I don’t feel attached to the characters, and the humanoid characters aren’t visually interesting to me, for the most part.