Tag: bandai

EVA01 Test Type – Evangelion – LM-HG 001 Bandai

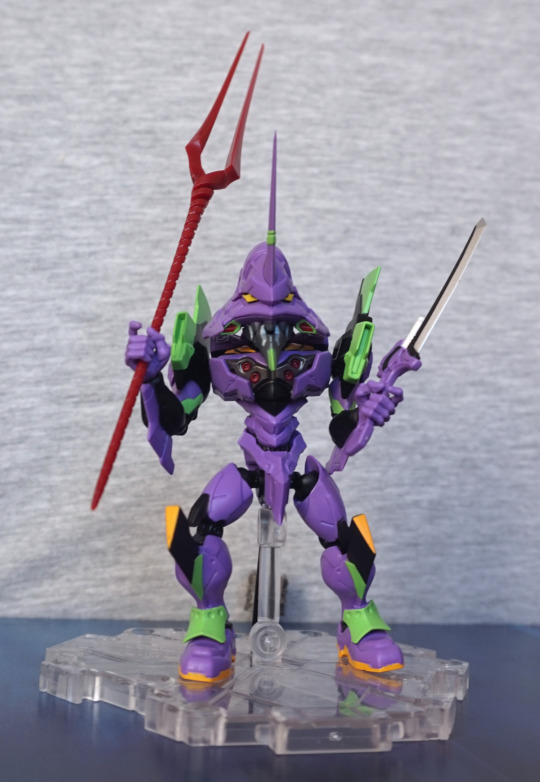
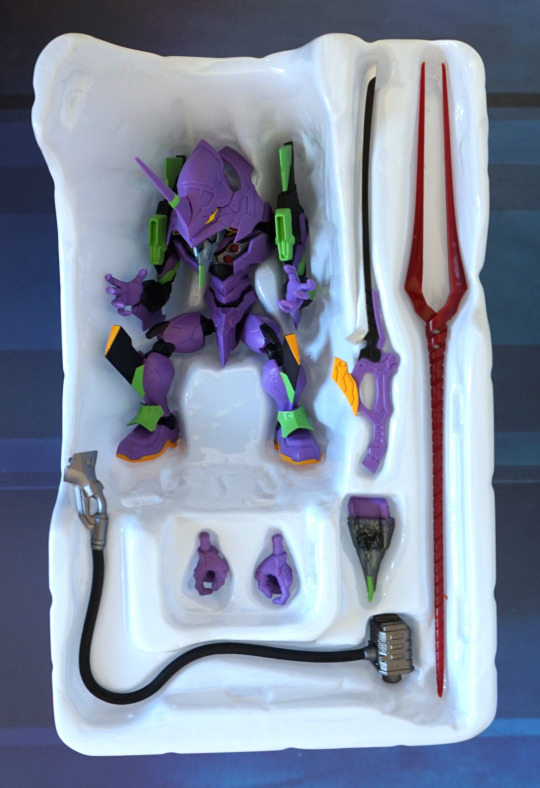
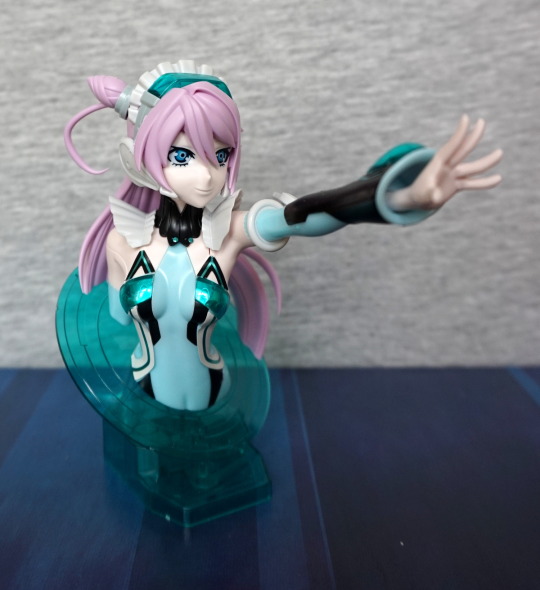
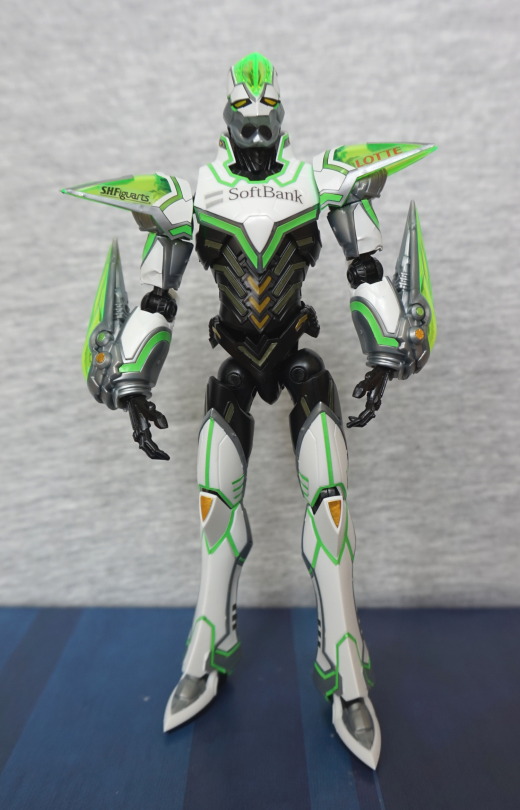
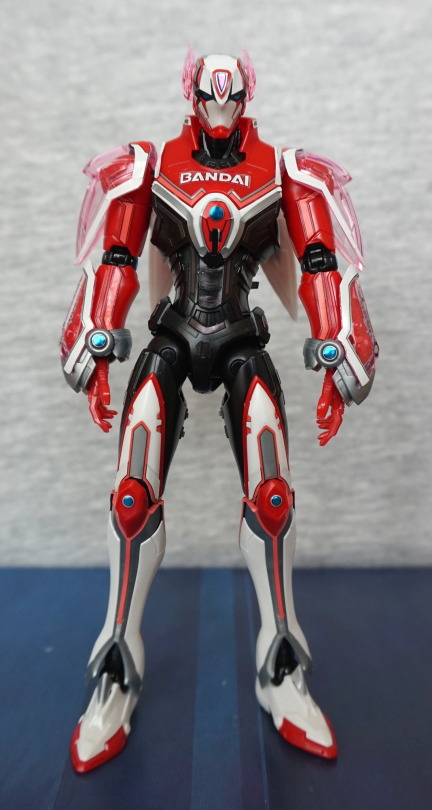
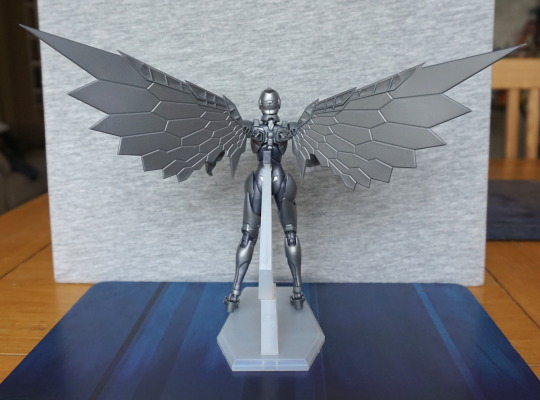
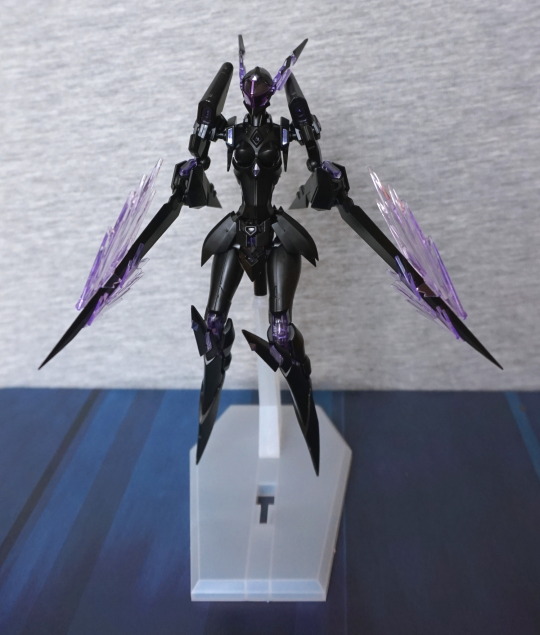
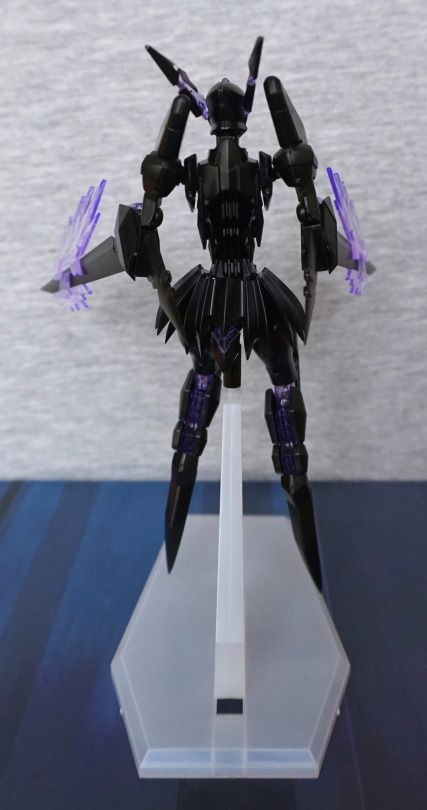
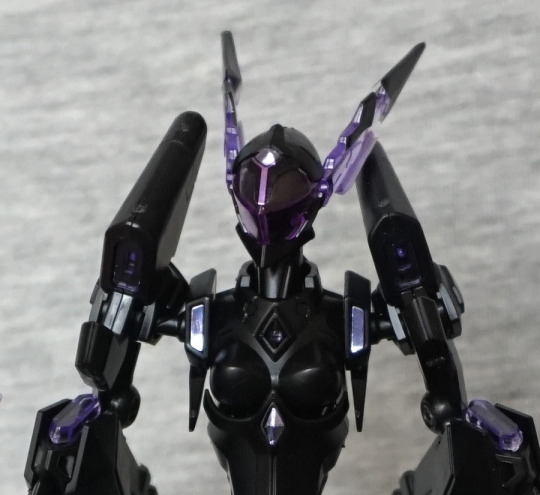
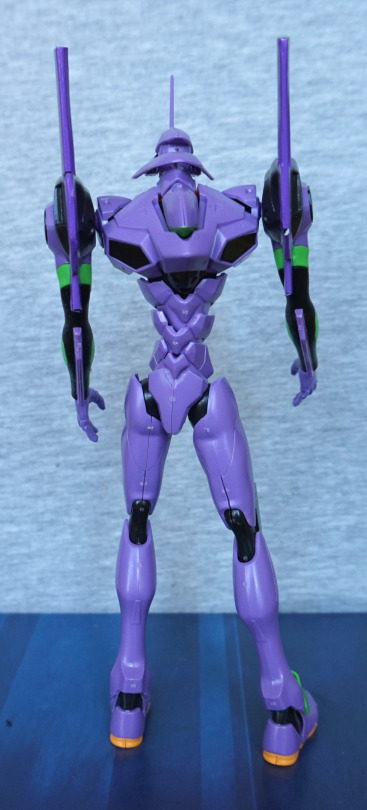
I couldn’t escape Japan without getting at least one model kit. So here’s EVA-01:

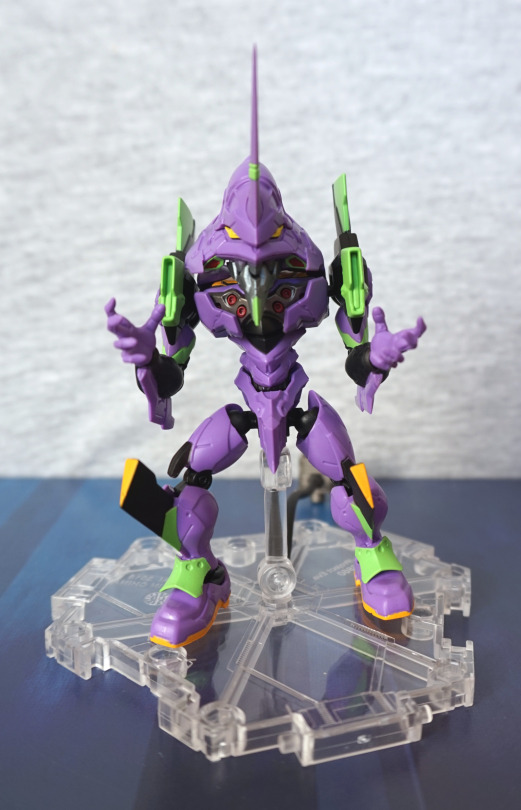
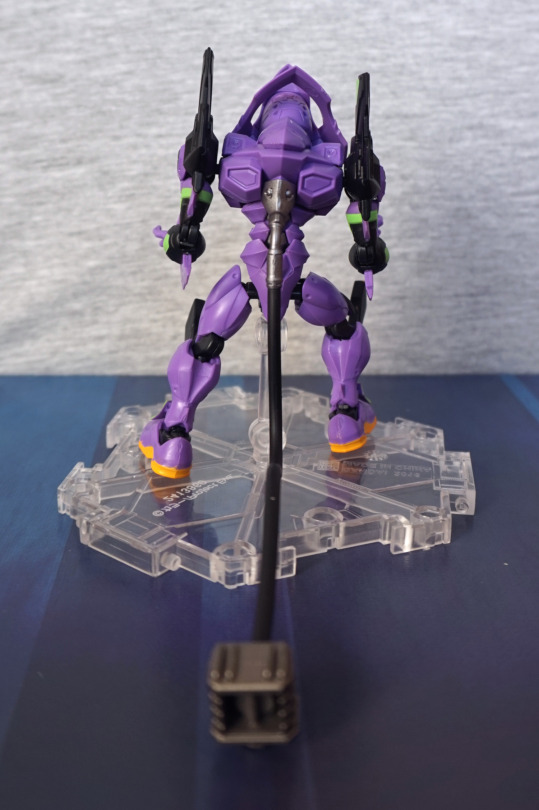
This one was a fiddly mess to build, and made me appreciate more modern model kits. The waterslide transfers were… a fair bit more tricky than I thought they’d be. From the front, he looks OK, but definitely a kit that could benefit from paint. Some of the areas are large and bland, and the blue plate could’ve done with some black dot stickers. 
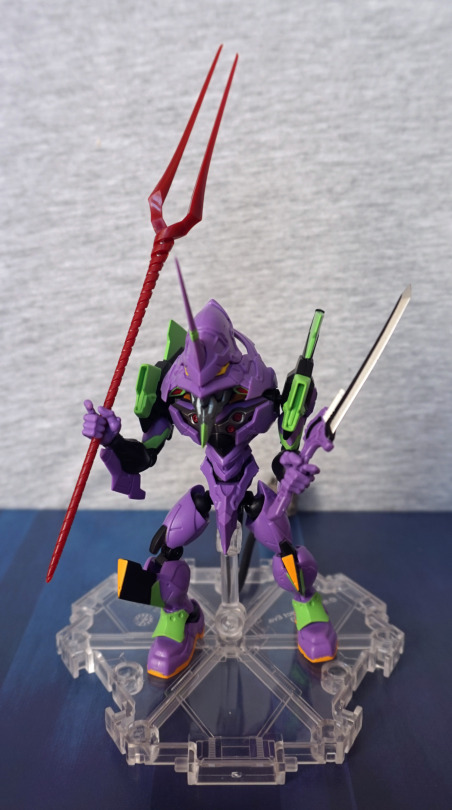
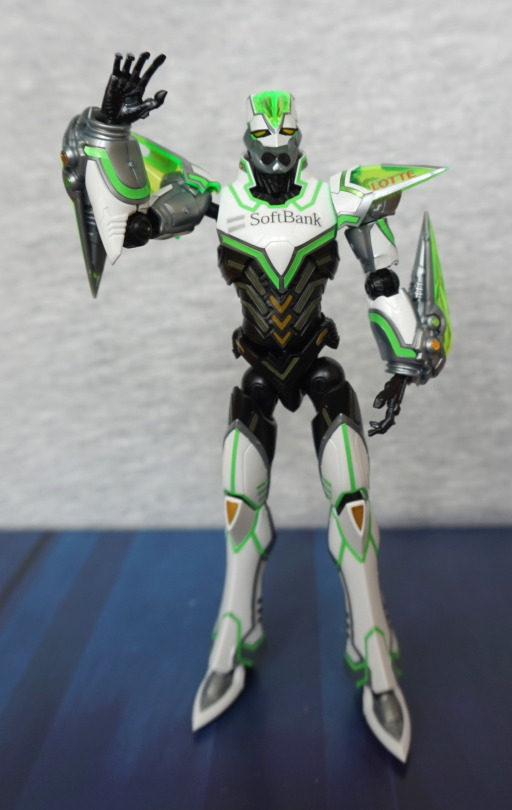
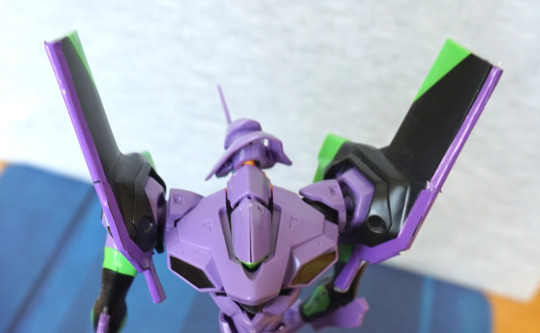
Head:

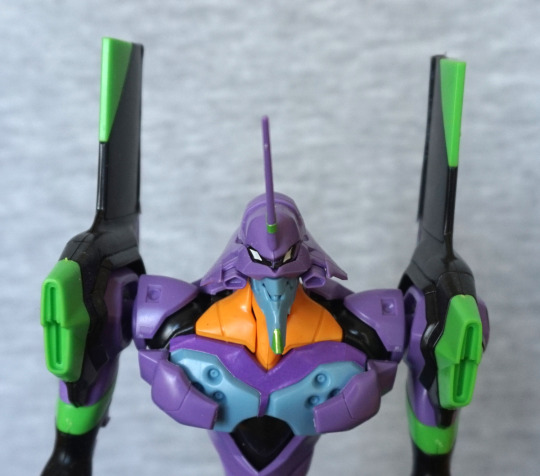
Rawr. He’s lookin’ at you. Face looks pretty good from the front, wish there were some black insets or stickers to go on the front green parts. Head itself articulates well. 

Knees:

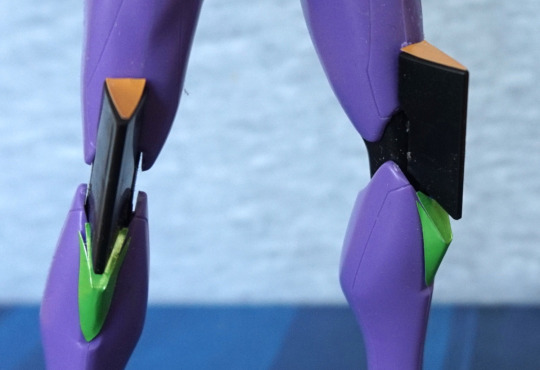
Just about got these stickers on OK :P. Here you can see the green stickers like to escape a bit. I like the use of colour here, and looks good from a distance. 
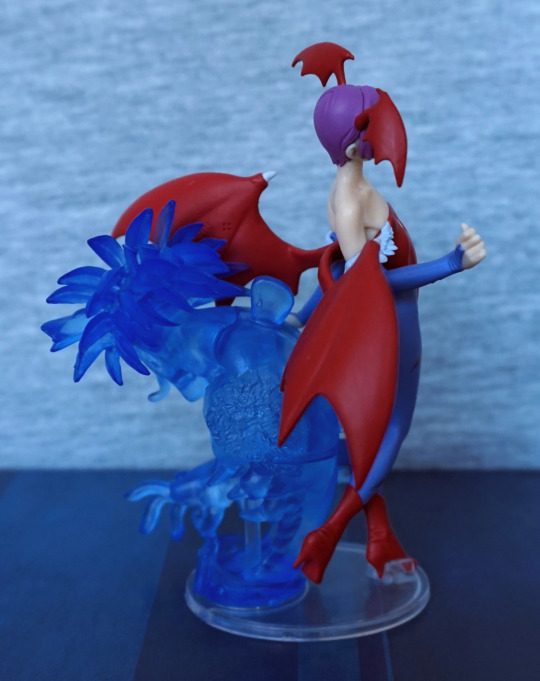
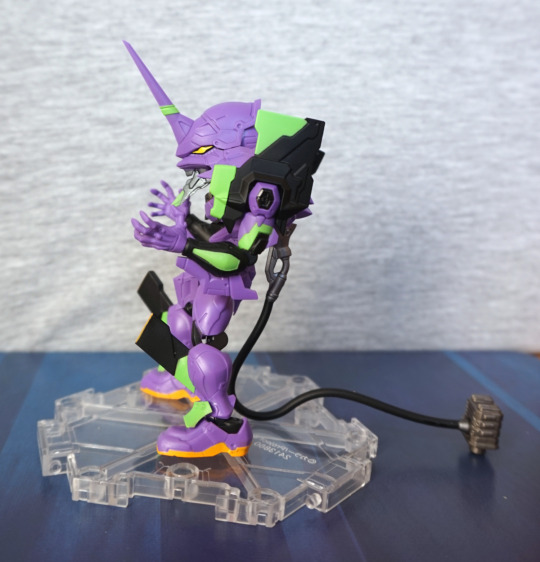
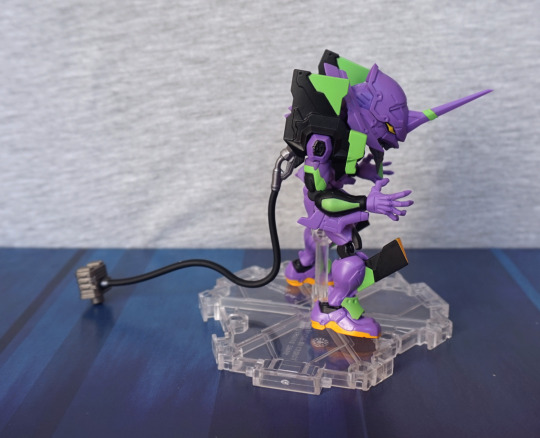
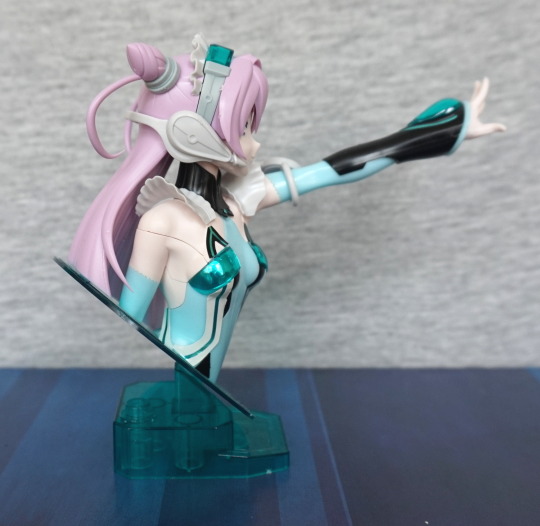
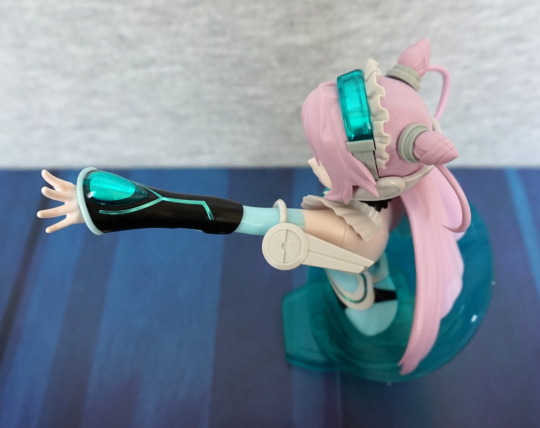
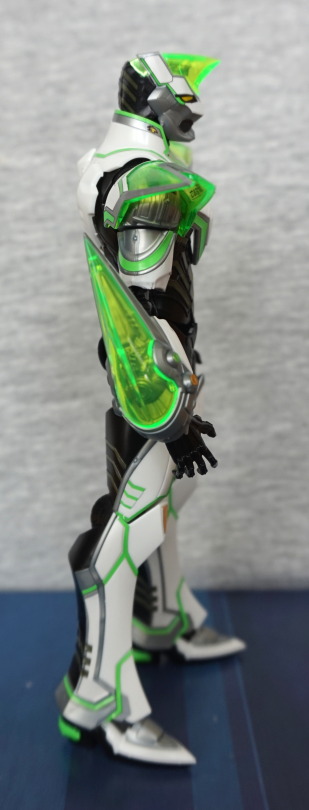
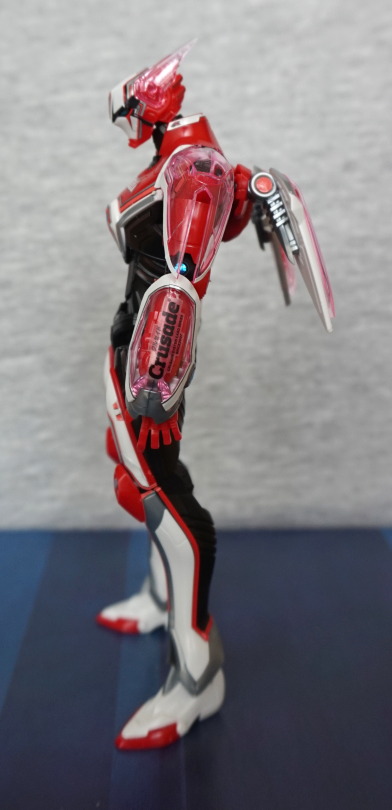
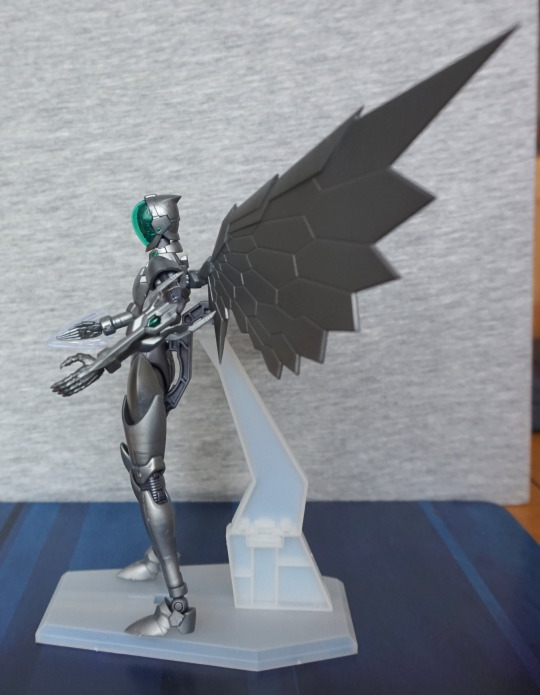
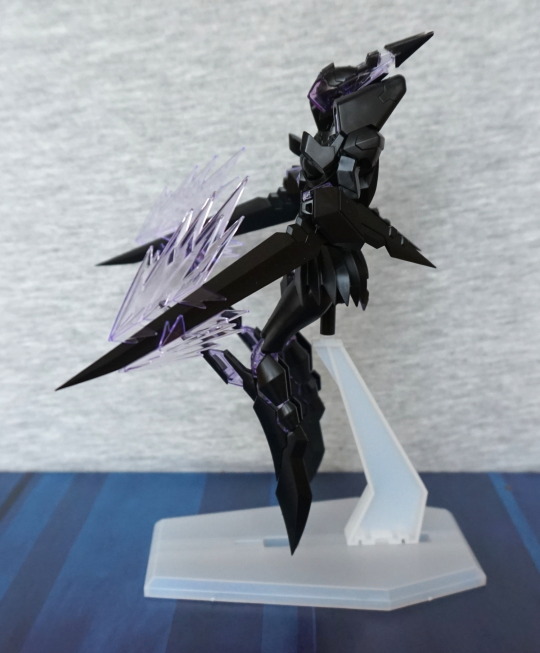
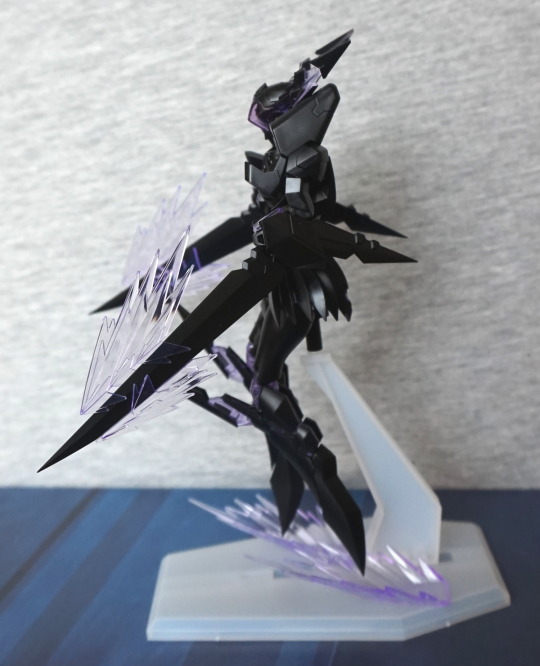
Left:

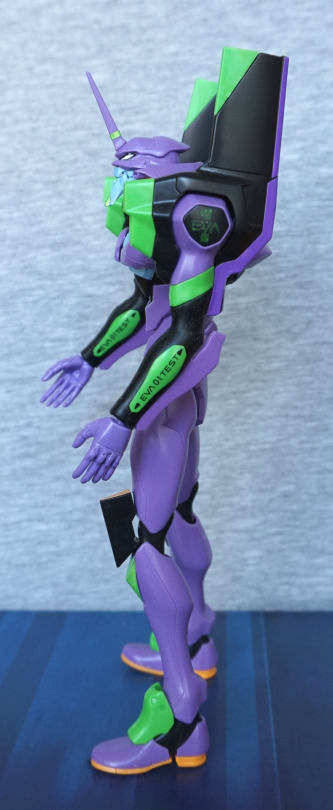
The purple stickers on the fins went OK. Here you can see the green decal didn’t go on too well, but the black ones were OK. From the left he looks pretty decent, and the colours work well. Here you can see some of the fluff stuck on the black parts of his arm already – this is a rubbery part. Not entirely sure why, but it’s kind of annoying due to being a dust magnet.
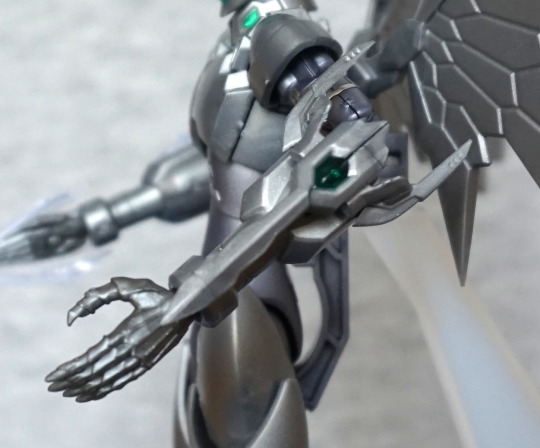
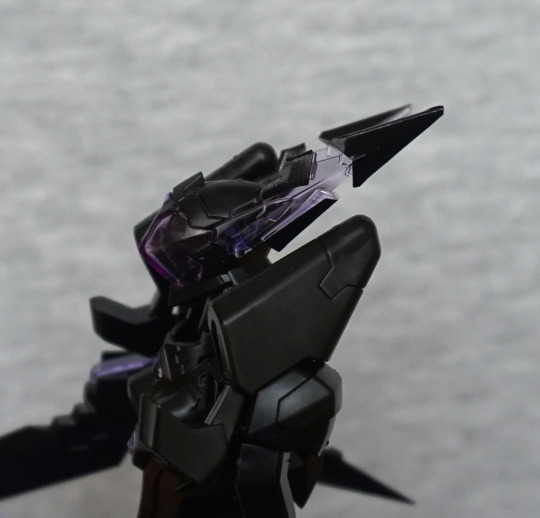
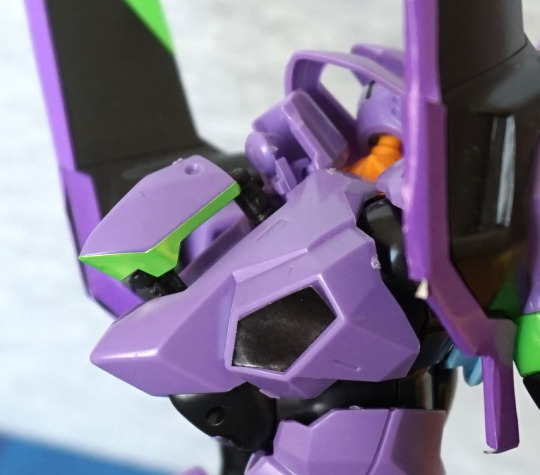
Head:

The triangular corners could’ve done with fitting on better. I like the green part on the lower arm though. His head looks good, though doing the stickers on his eyes was a pain. The head spike sticker works well though. The black parts on his arms articulate, which helps with posing.
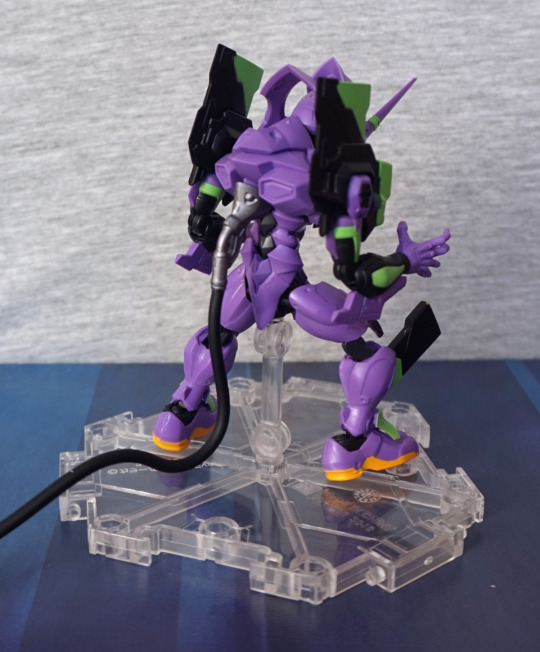
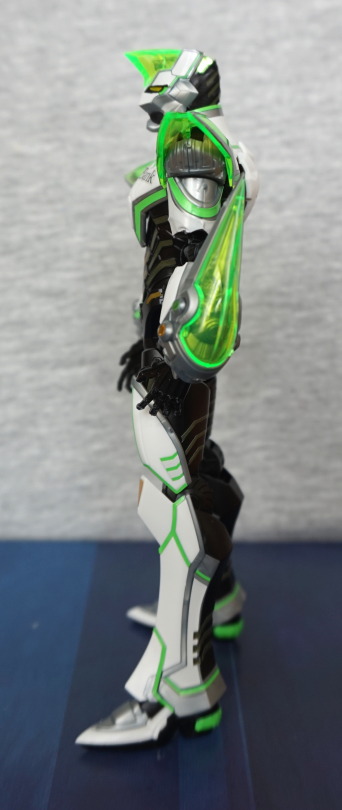
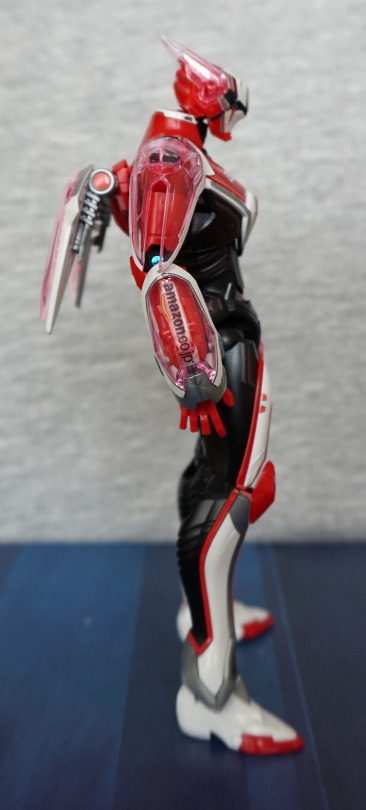
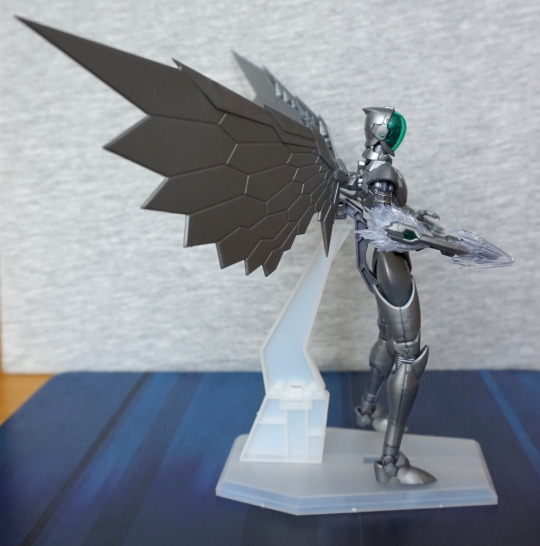
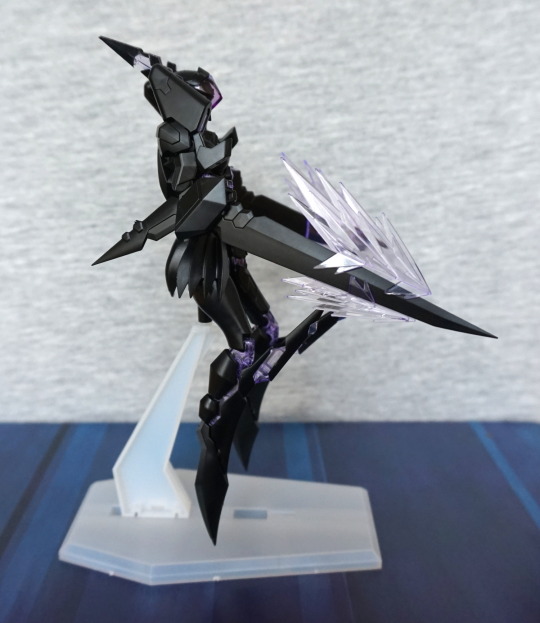
Right:

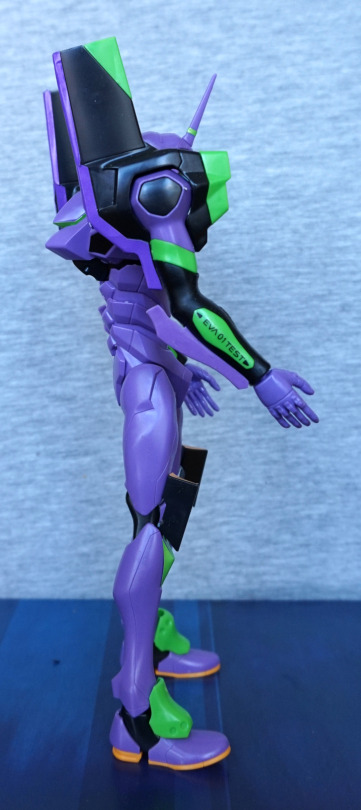
So… no 1 sticker on this side? Yeahhhh… it didn’t go well and ended up breaking up into three pieces, then one folded over, making it impossible to apply. Shame, because it was on OK, but then I accidentally nudged it with a finger :(. Though the green part at the top fits better on this side. The ribbing that forms his back looks good from the side too. 

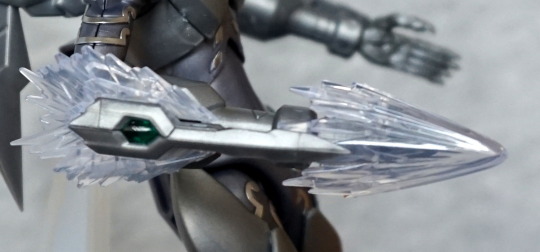
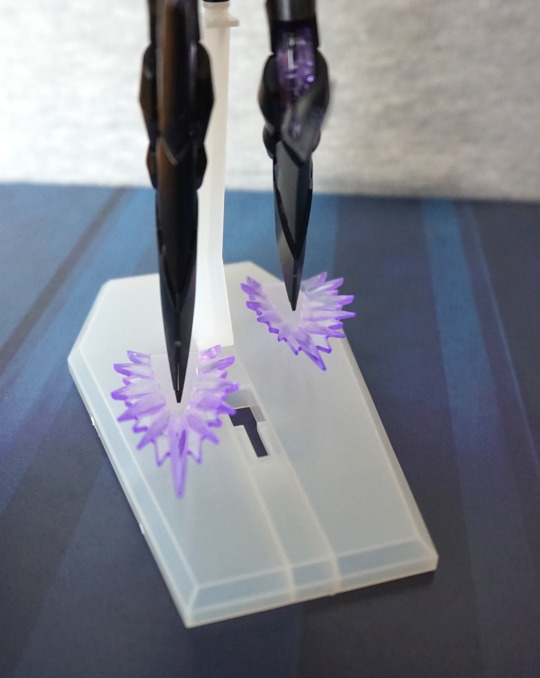
Close-up of the transfer that made it:

These ones worked well, once I worked out what I was doing. Still weren’t fun to do, but at least these look great once completed. 
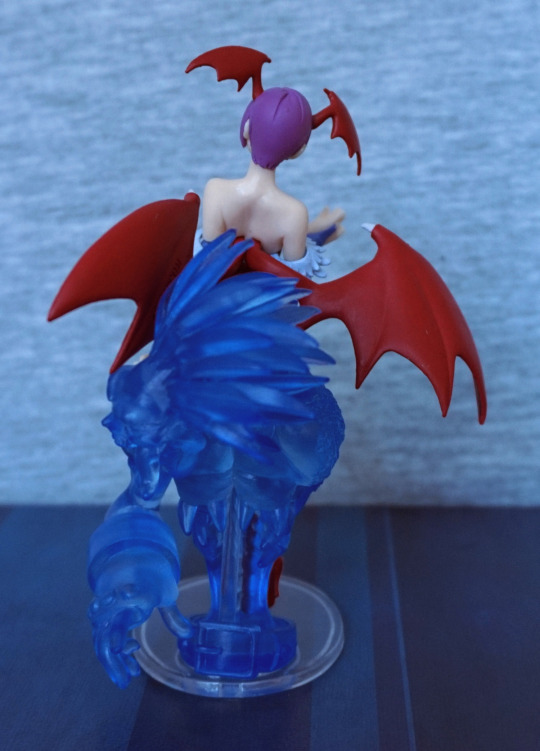
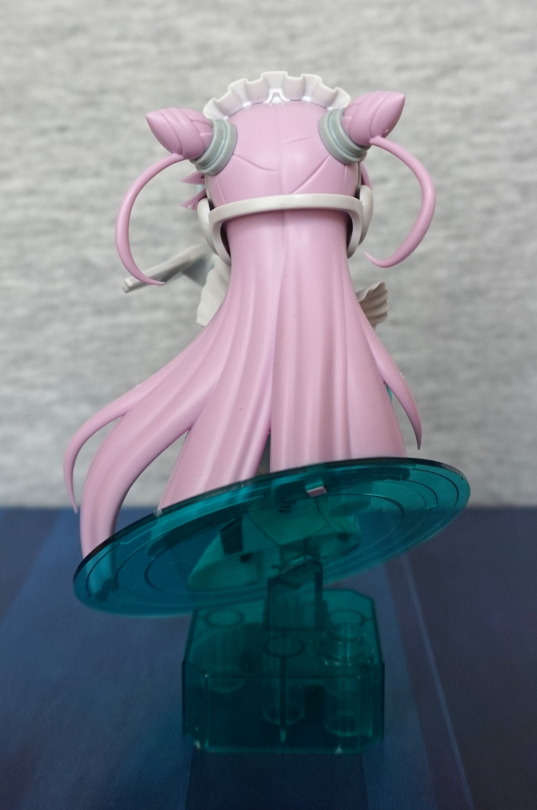
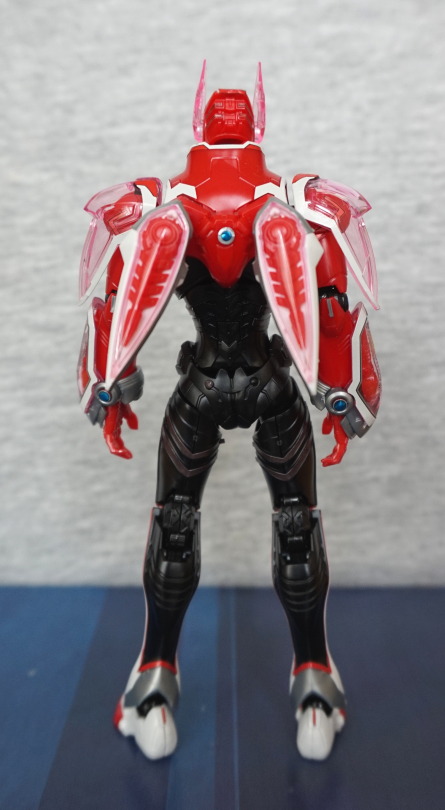
Back:

I like the shapes on the back. Here we have some black inset stickers – much-needed for the back, otherwise it’d look too flat. And we can see a bunch of mould edges – this kit was rather prone to them and I’m too lazy to sand ‘em all off. 
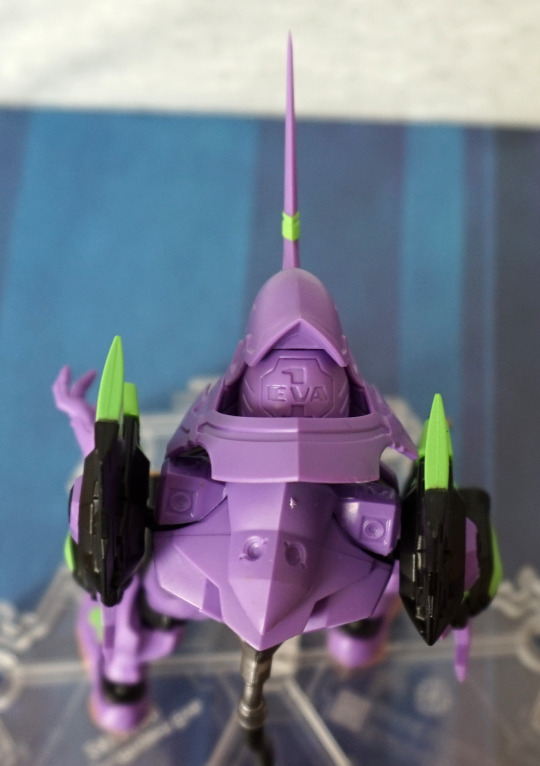
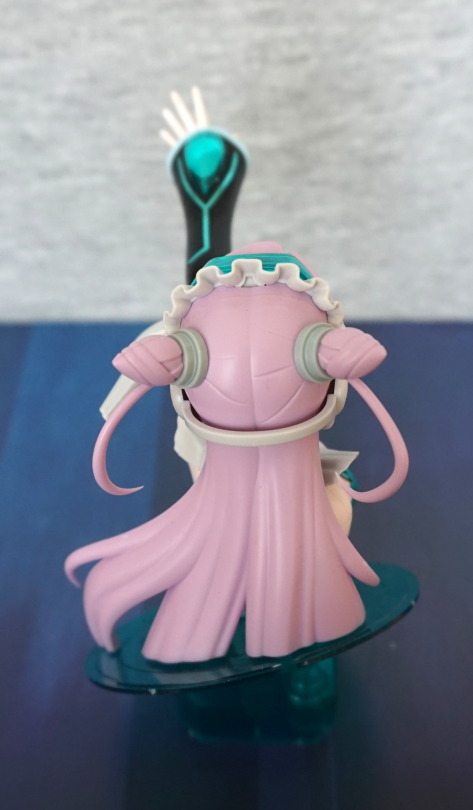
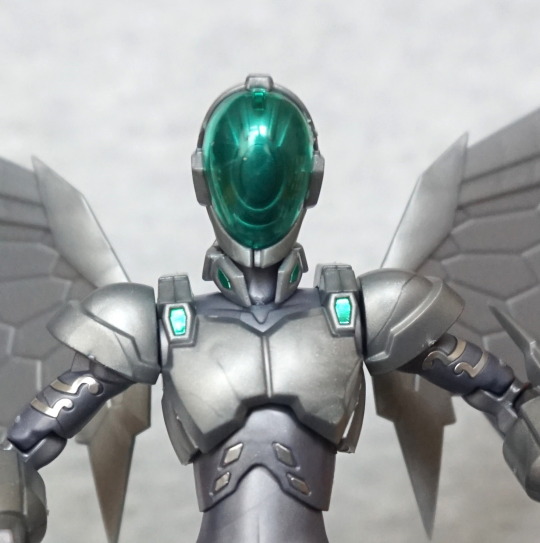
Top of the head:

Here we can see some rather special pieces…
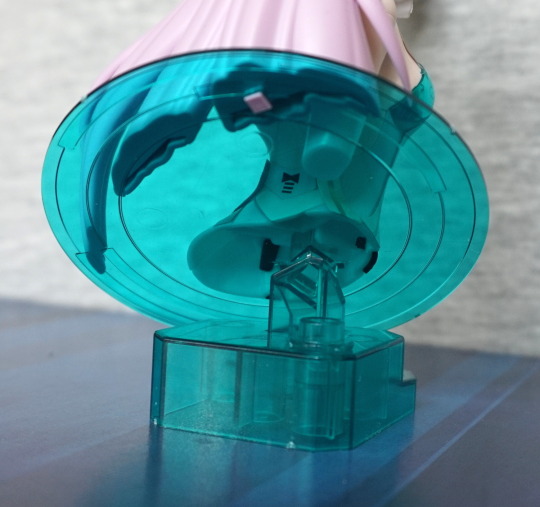
*Ptcffff*:

Here we can eject the entry plug! I like this little feature. And, um, I need to poke that sticker back on… The mechanism is a fun thing, but the little part that goes over the entry plug does have a nasty habit of popping off, and it’s a pain to get back on :/. The fact it has a few moving parts is nice, but could really do with having better ways of connecting! 

He also came with an oversized Shinji (well, a figure to fit that entry plug ain’t happening), which you could paint, but that got chucked in a drawer. It’s beige, doesn’t stand up on its own and looks rather meh. 

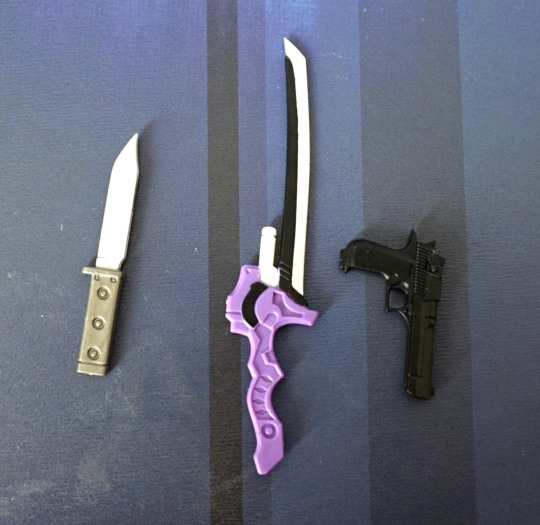
Overall, I wouldn’t recommend this kit. The result is OK, but not really worth the effort imo. He did come with some other accessories I didn’t photograph, which could make for good posing opportunities, but they’re nothing particularly special. There’s a big gun, but it can have a habit of falling apart and is plain grey unless you paint it. I don’t have any other EVA model kits to compare him to, though. Maybe get this one if you plan on painting it, as it would be a fairly decent base for that. 

Lala Satalin Deviluke – Metamo ver – To Love Ru

Aaannd now for a figure I got before Japan, but didn’t blog about… because I had to take more pics. Reason why shown later in the blog.

So here she is:

Definitely a happy Lala! I like the shading in her hair and her smiling expression. Her tail curves nicely around her, and the shower makes this figure a bit different from most figures. 

Face close-up:

Yep, diggin’ that grin and Peke (the hair decoration). The curls on the top of her head looks good, and her cleavage has been well done. The thin line of dark paint in her mouth adds a good element of definition. Here we can also see there’s some shading painted onto her skin too. 

Left:

She’s moulded nicely from this side – we can see the detail in her toes. In a way, she’s a fairly plain figure, but the shading in her hair really helps her not be boring. 

Tail close-up:

Her tail is nice, done with a shiny finish, which I think fits Lala. The tail can be rotated and displayed at differing angles. Here we can see a seam on her leg, but it does appear they’ve done some work to help hide it, so it’s not super-noticeable. 

Right:

Here we see more of the shower, which definitely helps her stand up – without it she can bend over a bit. The hair is nicely sculpted around her ear.

Back:

Her backside looks good, but the back of her leg has been interestingly sculpted. We can see here they’ve attempted to sculpt tendons, but it looks a bit wrong to me. Love the way her tail is a big feature from this angle. 

But wait, what’s this?

What’s going on? Britain is having a summer? Wait what? One of the selling points for this figure is that it changes colour when it gets hot – on the day I took the first set of photos it was hot enough for this to start happening. This should start happening around 30C, which is very hot for the UK. So she had a stint in the fridge before the above pics, then I couldn’t be bothered to heat her up and take more. 

So here’s some shots from the second photo shoot:

It transforms well, and will stay like this for a long time. Ended up putting her in the fridge to turn her back – I think between certain temperatures she will stay whatever colour she is, which is a nice thing. I think both options looks good, but I prefer the black version, so back in the fridge she went for awhile :P. 

Overall, I think this is a decent figure. I think she’s a cut above a prize figure, but not really comparable with scale figures. I think her original RRP might’ve been a bit on the high side, and the price I got her for, the aftermarket agreed. Glad to finally have a Lala figure that doesn’t break the bank. 

Lilith Aensland – Vampire

Just a small figure for today, but a trading figure I was excited to see:

Lilith from Vampire/Darkstalkers. I love the cute look on her face, and the strong, vibrant colours used for this figure. Her hair has come out nicely, along with all her wings. For a small trading figure, it has been painted well, and looks the part.

Left:

I like her jaunty pose. The wing paint is mostly where it should be,with only a little bit out of place. The bats on her leggings are nicely defined. Here we can see Lord Raptor’s face – it is nicely detailed, so you can see him well. The tongue is also a separate part – it came detached in the bag I bought it in, and it took me a bit to work out where it went XD. The figure likely came in a gachapon, so it is supposed to disassemble, but likely originally had assembly instructions. Fortunately these things aren’t too hard to construct.

Right:

Whilst Lord Raptor is one colour, they’ve done a good job with the texturing, so he looks good. It’s so easy for translucent figure and figure parts to look bad and cheesy, but here I think it works well. The backs of her wings don’t have too much to them, but that’s more the design of Lilth than the figure itself. It has the one notable detail she has – the creases on her wings.

Back:

Here we see Lord Raptor’s impressive mane :). And Lilith’s back, which has some definition to it. The paint and sculpt is impressive on this tiny figure, especially so for a trading figure.

I’m glad I was able to pick this one up, and would recommend it to anyone who likes it.. if you can get hold of it.

EVA-01 – TV ver. – Evangelion – NXEDGE

This one I ordered just before holiday and was delivered whilst whilst I was away. Well, I say delivered, more like chilled out at the delivery office until I paid the charges… This one sold out online in most places, so when it briefly was in stock again at AmiAmi, I went ahead and grabbed it, as I wasn’t sure if I’d see it in Japan if it was sought after. Turns out I could’ve picked it up, but I would’ve been annoyed if I didn’t see it and didn’t buy it when I could.

So here he is:

D’aww one cute l’il EVA. The articulation is very nice and smooth, and the colours are striking. 

Here he is from a more top-down angle:

The sculpting is really nice, and there’s a good amount of detail on this small model. For this, I feel he’s worth the price. 

Here he is in the box:

And the other bits that weren’t on display:

He comes with a goodly amount of accessories, as well as the stand, which I’m pleased with. The accessories all seem to be of good quality, with moulding and painting. 

Here he is from the front with no weapons:

Not sure if he wants to hug me or strangle me… 

Left:

Here we see his slit eyes, and the sculpting on his head, that not many figures tend to have in such detail. Here we can also see the fuel cable he comes with, which clips on reasonably well, but is still fairly easy to knock out. 

Right:

Yep, looking good from this angle too. Got all the li’l green details. 

Back:

Not much colour to speak of back here. On one of my other models, the “diamond” bits just above the fuel cable are black, but here they’re purple. 

Another back shot:

Certainly a fair amount of sculpting going on here, which makes EVA-01 eye-catching. 

Top:

We even have his EVA-01 logo sculpted into the top of his head. So if he’s drunk and lying in a ditch, you’ll be able to find out where to return him. 

Overall, I really like this small figure. Glad I got it, and I didn’t risk missing out on it, even if it would’ve been cheaper. If you don’t mind paying a fair bit for a small figure, I’d recommend him, and probably this series of figures. 

Liko – Active Raid – Figure-Rise Bust

I saw a video of this model kit, and decided I would like it, to continue on with my interest in all things model kit. I’m not familiar with the series, but loved the colour scheme, and thought she was cute. So here she is:

Not the easiest thing to take a picture of, due to her outstretched arm. And those dot stickers on her collar were in the right place when I built it *goes to fix it*. 

With this kit, the things that attracted me to it was the face, the base and the colour scheme. I love the way they have done injection moulding for her eyes – they’re actually constructed from plastic, rather than being stickers, which gives them a fantastic finish. And no need to worry about getting them crooked! My main issue with the kit was getting the flesh-coloured parts of her body to sit well together – here you can see the bit at the front is still a bit gappy. Other problem was the stickers – some of them didn’t quite seem big enough – main pain-in-the-backside are the ones above her chest – those V-shaped stickers seemed too small for the space they fit in. 

Left:

Here you can see some of the details on her sleeves, which are nice. Here you can see one of her body seams – they’re just kind of butt-ugly. She looks fine from the front, but the seams kinda make other angles a bit “eh”. Her hair flows nicely though,and I like the frill she has on her headband. Maybe I could go for a partial disassemble and sand down those bits of the sprue, but not sure it’s entirely worth it. 

Right side:

Another weird seam here. I do like the way she “projects” out of the base. Another interesting thing about this base is you can attach it to a Bandai stand, along with the mecha that goes with her. Probably won’t get the mecha though. 

Back:

Here we can see her flowing hair, which I think looks good. 

Top back:

A closer look at those unusually-shaped hair buns, which give some personality to the figure. You can also rotate them, to get her micro-pigtails at whatever angle is preferable to you. 

Bottom of the back of the base:

Here we can see how she is hollow and attaches to the stand. Getting the disc into the correct orientation was… fun. There wasn’t much guidance of how it was supposed to go, but some trial and error later, I got it. She attaches firmly to the stand, so not concerned about her dropping off or anything. The way her hair connects to the stand means her head does not articulate though. 

Above:

I love her sleeve. All of the translucent green pieces have silver stickers underneath, which help the green bits “pop”, which adds to the figure. Her arm at the white armband is a bit easy to knock apart though. Did knock her arm off mid-assembly, oops. 

Overall, I like this model kit. It wasn’t too hard to assemble, but I don’t think I would’ve paid a lot for it. If you find this cheap, and like the end result, I could recommend it, but kind of has limited display angles, due to the way the seams are, unless you really want to get some model putty and paint out. 

Tiger – Tiger & Bunny – Figure-Rise 6

And what would Bunny be without Tiger?

This one, the stickers were easier than Bunny’s I felt. Especially as the ridged ones sit in the ridges. Main downside of the stickers on this one is the leg stickers are prone to peeling on the pointy bits. The bits that go over his shins are two pieces, which is why they peel back from the edge, when clipped. Second annoying thing is his hips don’t like to be straight, and he seems to like to stand with a slight wonk at all times. Like Bunny, I find he looks impressive, and articulates well. 

Left:

Love the armour on his lower arms, and the angular armour on his lower leg. And a wonderfully pointy face. 

Right:

The lines add a lot of detail to his legs, but with them being several stickers, it was a bit of a laborious process sticking them all on. Worth it though! Not so worth it: Those white arm stickers. I don’t find they lie particularly well on the moulded plastic. 

Back:

Love the lines on the backs of his legs. The back shoe stickers were a pain though, as they’re a rounded blob that you have to sort of try and smooth them onto. There are some cuts in the sticker to aid with this, but not sure how much they helped. He also has a hidden peg hole, underneath a piece on his spine. I like the way this part blends well into his back, but it does have a protrusion, so it’s easy to remove with just a fingernail. 

Overall, these figures were mostly fun to build. Did make some mistakes along the way, but these weren’t too hard to rectify. Am pleased with the end result, and was worth it. If you want to kill an evening and end up with a nice-looking action figure, these kits may be for you. 

Let’s say goodbye Tiger:

Thanks for reading!

Barnaby Brooks Jr – Tiger & Bunny – Figure-Rise 6

After making the Black Lotus and Silver Crow model kits, I decided I needed more. After hunting around for something from an anime I was familiar with, I came across Tiger & Bunny. There were two versions – I chose the “Style 2″, as these ones looked nicer than the original counterparts. Doing the research for this blog, I think I made the right choice, but these ones were the far more involved to build, owing to the number of stickers they have. 

So, let’s see what the end result looks like:

I think he was worth the effort, and came out really well. The articulation is good too, and you can do a range of poses:

Here he is, running into battle. Or stopping Tiger from doing something stupid. The stickers, once on, work really well and give the figure a decent amount of detail. I love the blue shiny stickers. The downside of doing Barnaby’s stickers was that most of them sit on top of the ridges, meaning they’re hard to get in place. This is due to most of these areas having a coloured border. 

Left side:

Love the clear areas on the armour. His head has a good shape, and his head “fins” look neat. Also love the way the side of the legs turned out, where the colours work well together. 

Right side:

Not too much different from the left. Looks good 🙂

Back:

Love the wings/jets on his back. The detail of the red plastic behind the clear plastic works really well imo. Here you can see where some of the sticker son the back of his thighs didn’t quite sit right on the ridges. Annoying. And one of his butt stickers has since walked off :/. Not sure where that one went, sadly. 

The base of his spine comes out, to reveal a peg hole. I have some bases on order, so I can put Tiger & Bunny in action poses, when I display them. 

Overall, I’m definitely pleased with this figure, despite having to be careful not to nudge the stickers, and the amount of rude words that went into putting them on XD. If you’d like a more involved model kit, I would recommend this. 

Silver Crow – Bandai Figure Rise 6 Model Kit

I ordered this from Suruga-ya… then found I could’ve got it cheaper on Mandarake. Not sure if it was in stock when I first looked. However, I got this for around the same price as the Black Lotus kit, so I don’t feel like I overpaid. 

Here’s the completed Crow:

I do like the look of this Silver Crow. The silver stickers also worked better than I expected, which is a nice touch. The wings do have some plastic flaws in them from the moulding process though. 

Close-up of his face:

His mask is almost a bit too see-through, so you can see he doesn’t have a face. The green bits on his shoulders are stickers, along with anything silver. 

Left:

Though viewing his mask from the side is pretty cool – does look like there’s a head in there from this distance. The wings aren’t poseable sadly, so they’re stuck at this angle, if you equip them. There is the option to display him without them, though, if you prefer. I think the angle is a good choice, so not overly bothered by the lack of movement within the wings. 

Right:

Here I have the blast arm parts equipped – I think these look good. The upper arm needs to be specially constructed, but the lower part simply fits onto her hand. 

From the back:

His back looks good, but his wings… have plastic-saving holes. Would’ve been nice if this part was flat, or had a part to clip onto the back of the wings to cover it up. 

Here’s Silver Crow’s arm in combat mode, without the blast: 

Looks pretty cool and bulky. 

Close-up of the arm with the blast:

The blast replaces the “forked” parts of the bracer. 

Overall, I’m pleased with the result of this kit. He’s decently poseable, but the clip part that allows him to stand on the stand could do with being a fraction taller – he just about stands with this, but it’s a bit of a squeeze. If you don’t want him standing, then you have a few more options I feel. 

Black Lotus – Bandai Figure-Rise 6 Model Kit

Now for the first model kit I constructed. I have done these model kits in the opposite order, as I have some more Accel World goodies coming up.

So, here she is:

In her black, kind-of-annoying-to-photograph form! She wasn’t too bad to build – main annoyance was ensuring I was building the parts for combat mode instead of “normal” mode. Near the beginning I made a mistake, but I was able to rectify it pretty easily. She’s not really swappable between forms – you have to pick one or the other when building. Seeing as I prefer combat mode, I went for that one. Gotta have moar purple and longer swords!

Left side:

The blasts hold reasonably well. They simply wedge onto her blades. Bottom ones can come loose if she gets nudged. The blocks on the back of her legs have two ways they can sit, to show and hide the purple parts. The purple protrusions from her head have black stickers on them, to make them purple and black, and that came out well. 

Right side:

I do like the way the arms came out – they’re really cool. 

Back:

Some lovely lininess going on. The purple part on her skirt was the bit I missed at the beginning – ended up putting in the “normal” mode one, then realising it wasn’t “plug n play”, and I had to pick during construction. 

She also comes with some landing “splash” effects, if you want to pose her, as if she’s coming in to land:

Imo, they look pretty cool, and love the fact they included them:

Here’s a close-up of her head:

In which you can see the three stickers adhered to the fins on her helmet, to make them appear as they do. 

Close-up of her upper half:

I like the shininess of the stickers provided – they really add to the figure, though I balls’d up the gem in the middle a bit. She also has some extra purple plastic accents on her arms and shoulders here, for the combat mode. 

Am really happy with the finished result. She’s articulated quite well too, so you can do all sorts of posing with her too. Is quite cool, building your own articulated kit. Certainly happy with this kit, and will be building more Figure Rise 6 kits in future. 

VF-31F Siegfried (Messer Ihlefeld’s) – Macross Delta – Bandai Model Kit

Now for my new “thing” – model kits! I bought two larger kits from one of my favourite series, and stuck this in on a Mandarake order on a whim. 

After a lot of bitching at stickers later, I had this:

Next time I’m totally going to be using my tweezers to help out with the stickers, and there will be a next time! The pictures were pretty easy to follow, despite me not reading a word of Japanese. You do need to look carefully to work out what’s going on though, if you can’t read what’s being said.

Here it is from the other side, similar angle:

Quite happy with the end result, but I would’ve liked to get that cockpit sticker a bit flatter. It’s amazing how the stickers transform it from being a boring, grey and white plastic model to something quite colourful. 

From the top:

Looks pretty neat from the top. Not sure if the logo is quite in the right place – I did centre the logo on the centre of the plane, but the wing does just touch that black line on the other sticker. Also you can see where the cockpit doesn’t quite align. 

Side shots:

Looks nice in profile. Some very small stickers with writing on, to tell you that it’s a VF-31 Siegfried. One cool thing about this stand is that the peg that goes into the craft is on a ball joint, so you can angle it however you’d like and turn it around. 

From the back:

Engines look OK, though lack of fire :P. The small block on the back of the stand can go into the bottom of the fighter, if you don’t wish to have it on the stand. I love the fact they provided a space for this block on the back of the stand, so you don’t lose it. What I love less is the fact that I ended up putting this block in during the building of this craft, then I had to get some hooked pliers to get it back out again :P. Wasn’t so bad as I had some on hand. I guess the instructions may’ve said something about what it was for, but oops. 

After completing it, I quite like this craft. It is very small (10cm/4″ from the engines to the tip of the cockpit), but it cost me the grand total of £4.08, so I can’t complain about the price. I enjoyed building it enough, that I’ve ordered some more. They’re quite quick to build (at least for a model kit), so if I’ve got an hour or so spare, then I can entertain myself with building one of these! 

Satan

It’s finally complete! This is the third of three figures in this set. I bought this from Suruga-ya, and had it shipped via Big In Japan. The process went smoothly, though I did have to wait for BiJ to reopen after New Year’s. As I heard that Suru has a tendency to use oversized packaging, I paid for the repacking service anyway, even prior to adding a second package to the “ticket”. Glad I did:

120 size means the box edges add up to 120cm. When BiJ repacked my order, it fit into SAL small packet, which means the box dimensions added up to less than 90cm (it was ~87cm iirc). Glad I paid for the repacking! 

So here’s Satan from the Bandai EX-F Devilman series:

This figure I found a lot less fiddly to assemble than the others – largely because there’s less parts. The clip that holds his wings to the rock was a bit fiddly to get in. It would be possible to not use the clip, but he’d probably eventually lean. Unlike the other two, I don’t think I’d display him on his own. Especially with the stone appearance, he’s a lot more bland than the others too, though the sculpt is nice. 

Facing Satan’s front:

He’s much more to look at from this angle – kind of a shame they didn’t find a way to make him face more forwards, so he’d show more from the front. The sculpting definitely shows form this angle. 

Here he is from the side:

Pointin’ at you! Looking very stern. 

His back:

The wings look nice from this angle. Does look like he’s in mid-movement. Painting of the rock is nice, but there’s a pretty visible seam there. Though you’re probably  not going to look at this angle much. So how does the set look?

Like this:

These figures go well together as a set (as they should do!). Sirene could be displayed on her own quite happily, but the front two need at least each other to look right. It’s a very nice set, and I’m looking forward to having somewhere to display them soon :). They’re nice on the dining room table, but I don’t think they want to “live” there!